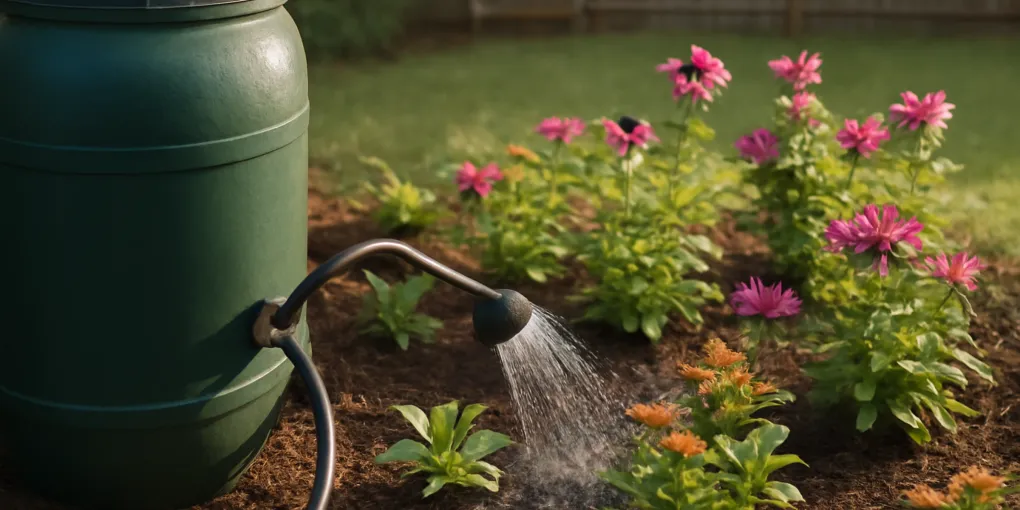
How to Water a Pollinator Garden from a Rain Barrel
ProtocolQuick picks
Low-flow watering wand with thumb shutoff
★ Top pick Best for new plugs- Use Case: Placing a gentle shower around individual native-plant root balls
- Best For: First-season plugs and mixed beds where each plant needs inspection
- Watch For: Usable gravity flow, positive shutoff, removable shower head, and hose-thread quality
Non-compensating soaker hose, 25 feet or shorter
Best for a dense level bed- Use Case: Slow root-zone watering through a short, level planting strip
- Best For: Established dense beds with similar moisture needs
- Watch For: Low-pressure performance, uneven flow on slopes, flushing access, and water hidden under mulch
Wood-chip or leaf mulch for native beds
Best water saver- Use Case: Reducing surface evaporation while newly planted roots establish
- Best For: Open soil between pollinator plants
- Watch For: Locally appropriate untreated material, shallow application near crowns, and no mulch piled on stems
A new pollinator garden and an established native bed should not receive the same rain-barrel routine. New plugs have small root balls that can dry before the surrounding bed looks thirsty. Established, site-matched perennials may need supplemental water only during extended dry weather. The barrel is most valuable when you spend it on the plants that have not yet built resilient roots.
Use a low-flow wand for scattered plugs and a short soaker hose only for a level, densely planted zone that you have tested under gravity flow. Water the soil, not open flowers. Check moisture at root depth before and after each session, then reserve the remaining barrel water for recent transplants, host plants under stress, and the driest edge of the bed.
Choose the method by bed stage
| Garden situation | Best rain-barrel method | What to verify |
|---|---|---|
| New plugs planted this season | Low-flow wand at each root ball | Water reaches the plug roots without washing soil away |
| Mixed-age border | Wand, plant by plant | New plants receive water while established drought-tolerant plants are skipped |
| Dense, level established bed | Short non-compensating soaker hose | The far end wets the soil before the barrel loses head pressure |
| Sloped pollinator strip | Wand from the low side or short divided zones | Water infiltrates instead of running downhill from upper plants |
| Containers with pollinator plants | Watering can or wand with shutoff | Each pot drains and no saucer stays flooded |
| Seeded meadow area | Site-specific establishment plan | A 50-gallon barrel may be too small for uniform germination over a large area |
This is a fit matrix, not a promise that one accessory works everywhere. Barrel elevation, hose length, emitter resistance, slope, and remaining water level all change gravity flow.
Quick picks
| Equipment | Choose it when | Skip it when |
|---|---|---|
| Check low flow watering wand thumb shutoff garden on Amazon | You need to inspect and water individual new plugs | The bed is too large to reach plant by plant |
| Check 25 foot soaker hose low pressure rain barrel on Amazon | One dense, level zone has similar moisture needs | The line climbs, exceeds 25 feet, or waters unevenly |
| Check natural wood chip mulch garden untreated on Amazon | Open soil dries quickly around young plants | The planting intentionally preserves bare-ground bee habitat |
Start with the wand for a new mixed bed. It lets you spend water on recent plugs without soaking established drought-tolerant plants. Add a soaker hose only after a partly full barrel wets the complete line in a test.
What to buy for the job
For individual plants: a low-flow wand
Choose a watering wand with a thumb or lever shutoff and a removable shower head. Check low flow watering wand thumb shutoff garden on Amazon. The useful feature is control at the plant, not a long list of spray patterns. You should be able to close the flow while moving between plugs without walking back to the barrel.
Avoid a pressure-dependent nozzle that produces only a weak dribble on gravity flow. Keep the hose short, run it level or downhill, and test the wand with the barrel partly full. A tool that works only when the barrel is brim-full will frustrate you during the dry period when stored water matters most.
For one dense zone: a short soaker hose
A 25-foot or shorter non-compensating soaker hose can water a level bed slowly. Check 25 foot soaker hose low pressure rain barrel on Amazon. Do not assume a 50- or 100-foot hose will distribute evenly from a low barrel. Long porous hose, uphill runs, filters, and connectors consume the limited pressure.
Lay the line before mulching, open the barrel, and check the soil at the near, middle, and far sections after a timed test. If only the first section wets, divide the bed into shorter zones or return to hand watering. Pressure-compensating drip emitters may not open at gravity pressure unless their documentation specifically gives a compatible range.
For moisture retention: local mulch first
Xerces Society habitat guidance emphasizes regionally appropriate plants and maintaining habitat without unnecessary pesticide exposure. Mulch choice also needs to fit the planting community. Use locally appropriate untreated wood chips, shredded leaves, or another material recommended for the specific native plants. Do not bury crowns or cover bare-ground nesting areas that the garden intentionally provides.
Amazon mulch is rarely the economical choice for a full bed, but a bounded search can show bag sizes and untreated options: Check natural wood chip mulch garden untreated on Amazon. Compare that with local arborist chips, municipal mulch, and native-plant nursery advice.
The seven-step watering protocol
1. Inspect the water and collection system
Confirm that the barrel lid and inlet screen are intact and that the stored water has no chemical sheen, sewage-like odor, or obvious animal contamination. Disconnect collection after roof treatment, painting, wildfire ash, or another unusual contamination event until local guidance says the roof and system are ready.
This is non-potable irrigation water. Keep the barrel closed and screened, and follow local rainwater-harvesting rules.
2. Divide plants into establishment groups
Mark plants installed this season, plants moved recently, and established plants. New plugs and transplants get first claim on barrel water. Established native plants that are correctly matched to the site’s soil, light, and drainage may be skipped when their root-zone soil remains adequately moist.
Do not treat the label “native” as a universal drought guarantee. A moisture-loving native planted on a dry slope has different needs from a prairie species in full sun. Penn State Extension’s pollinator-gardening guidance recommends matching plant selection and site conditions; that fit determines irrigation demand after establishment.
3. Check at root depth
Move mulch aside and feel the soil beside the root ball, not just at the surface. For a new plug, compare the plug medium with the surrounding soil. Peat-heavy nursery media can dry faster or resist rewetting even when the adjacent soil feels damp.
If the root area is still moist, wait. If it is dry and pulling away from the planting hole, apply a slow first pass, pause, then return after water has soaked in. If water stands in the hole, stop and investigate drainage rather than adding more.
4. Water early and below the flowers
Place the wand near the soil and apply a gentle shower around the root zone. Keep the stream off open blooms, caterpillars, and visiting insects. Early morning is practical because temperatures are lower and accidental leaf wetting has time to dry.
For a clump-forming perennial, water around the outer root area rather than pouring everything against the crown. For milkweed and other host plants, look for eggs and caterpillars before moving stems or laying hose through the bed.
5. Use a two-pass method on dry soil
Give each priority plant a short first pass, then move to the next. Return after several minutes and apply the second pass where the first has infiltrated. This reduces runoff from crusted or very dry soil and lets you see which planting holes absorb poorly.
Do not specify gallons by plant without considering plant size and soil. The visible endpoint is moisture through the root ball and into nearby soil without ponding or surface runoff.
6. Test distribution, not timer duration
If using a soaker hose, check soil in at least three places. The near end can look successful while the far end stays dry. Mark the valve position and elapsed time only after confirming that the entire intended zone wets evenly.
As the barrel empties, repeat the far-end check. Gravity pressure drops with the water surface. A setup that wets 25 feet from a full barrel may not do so from the last third of storage.
7. Recheck the next day
Check the same root zones the next morning. If the plug is dry again while nearby soil stays moist, the original potting medium may need slower rewetting and better soil contact. If the hole remains saturated, reduce watering and assess drainage.
Record only useful site facts: which edge dries first, which new species needs closer checks, and how much barrel level one session uses. That turns a limited supply into a targeted establishment tool.
How far will one barrel go?
One inch of water over one square foot equals about 0.623 gallon. A uniform inch over a 100-square-foot bed would therefore use about 62 gallons. That calculation explains why a 50-gallon barrel cannot replace rainfall across a large meadow-style planting.
A root-zone protocol stretches storage by treating only dry priority plants. It does not justify chronically under-watering a newly seeded area that requires uniform moisture for germination. If you are establishing a large seeded pollinator plot, plan an adequate water source before sowing rather than assuming one barrel can cover it.
Nominal capacity also exceeds usable spigot volume. Water below the outlet, sediment space, and a barrel that was not completely full reduce the amount delivered. The rain barrel dry-spell watering plan helps rank multiple garden zones when storage runs low.
Pollinator-specific mistakes to avoid
- Spraying flowers: it disturbs visiting insects and spends water on petals instead of roots.
- Watering every established plant equally: recent plugs usually need closer attention than deep-rooted established plants.
- Running a long hose without checking the far end: low gravity pressure can create a wet entrance and dry back half.
- Covering all bare soil with mulch: some ground-nesting bees need appropriate exposed soil; preserve intentional habitat features.
- Dragging hose across host plants: inspect for eggs and caterpillars, then route hose along paths or bed edges.
- Using pesticides around irrigation time: follow pollinator-safe integrated pest management and product labels; water is not a reason to expose blooming plants to insecticide.
- Assuming every native plant wants dry soil: match irrigation to the species and site, especially during establishment.
A practical plan for today
For a first-season mixed pollinator bed, buy a controllable low-flow wand before buying an automatic timer. Check every new root ball, water only the dry ones in two gentle passes, and leave established plants alone when their soil is still moist.
For a dense level bed, test a short soaker hose from a partly full barrel. Keep it only if the far end wets reliably. Add locally appropriate mulch around plants while preserving crowns and intentional bare-ground habitat. These choices are specific to a pollinator planting: protect blooms and insects, prioritize host plants and new plugs, and preserve nesting features while directing limited water to roots.
Sources
- Penn State Extension: Pollinator Gardening
- Xerces Society: Pollinator-Friendly Plant Lists
- U.S. EPA: Soak Up the Rain, rain barrels
- Rutgers Cooperative Extension: Rain Barrels
Frequently Asked Questions
- Stored roof runoff can be used for appropriate non-potable landscape irrigation when the collection system is covered, screened, maintained, and allowed locally. Apply it to soil around roots rather than spraying blooms and visiting insects.
- Check the actual root balls and surrounding soil instead of using one interval for every site. New plugs need closer monitoring during establishment; established locally adapted plants often need less supplemental water after roots expand.
- A wand is better for scattered new plugs and plants with different needs. A short soaker hose can suit a dense, level bed, but gravity flow may be uneven and the line must be checked rather than assumed to work.
- Direct water to the soil early in the day or when insect activity is lower. Avoid spraying flowers and insects. Root-zone watering also loses less stored water to foliage and evaporation.