Quick picks
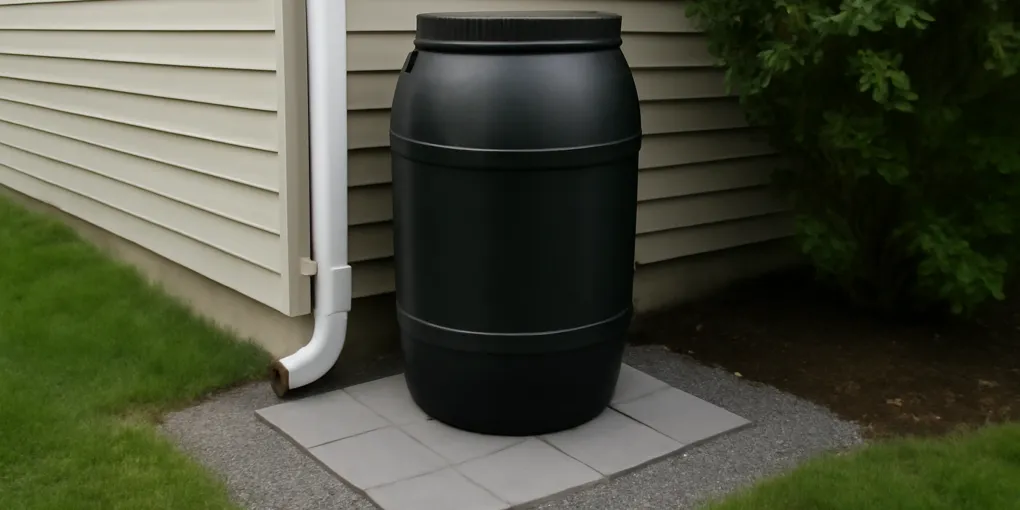
FCMP Outdoor Raincatcher 4000 Rain Barrel
★ Top pick A measured option for a prepared pad- Footprint: 24 by 24 inches
- Best For: A homeowner who can prepare a square, level pad directly below an open downspout
- Watch For: The barrel, base, and downspout height must be measured together before cutting or moving anything
A rain barrel needs a base before it needs a downspout connection. A finished barrel can look stable while empty and settle or lean once it fills. For a small residential setup, a compacted gravel layer topped with flat pavers is a practical way to make a firm, level surface when the soil is not already stable.
This is a beginner installation guide for a barrel placed close to a downspout. It does not replace local requirements or the barrel maker’s instructions. The goal is simple: make the base solid and level, then measure the final barrel height before changing the downspout.
The one product decision that follows the pad
See current FCMP Raincatcher 4000 options
Its documented 24-by-24-inch footprint must fit your planned pad, and an open screened inlet must be able to sit directly under the downspout. It is a bounded fit, not a universal answer: skip it if the walkway cannot spare two feet of depth or the site needs a sealed diverter connection.
Start with the full footprint, not the barrel’s widest curve
Read the manufacturer’s dimensions and mark the complete footprint on the ground. Add enough room to reach the spigot and lift the screen or lid. Do not size the pad by eye or use a few loose bricks under the edges.
Penn State Extension advises choosing ground that is level and firm, with the barrel near an accessible downspout. University of Maryland Extension similarly notes that loose or soft soil should be compacted before a gravel-and-paver or block foundation is built. Those details matter because the base and the barrel are one system: the barrel has to remain supported evenly as its weight changes.
For a 24-by-24-inch barrel, make the finished paver surface a little wider than the listed footprint. That gives you a visible edge to inspect and helps prevent the shell from sitting partly on soil. Keep the pad close enough to the downspout that the chosen inlet or diverter can connect without a stretched hose or improvised elbow.
Build the pad in this order
- Remove sod, mulch, and loose organic material from an area larger than the barrel footprint.
- Rake the exposed soil roughly flat and tamp it. If a heel easily leaves a deep impression, keep working the base rather than covering soft ground with pavers.
- Add a shallow layer of compactable gravel and tamp it in small passes. The purpose is a firm, adjustable bedding layer, not a pile of loose stone.
- Set flat outdoor pavers or appropriate blocks across the whole footprint. Check them with a level in both directions.
- Tap and recheck until the pavers meet evenly, without a corner that rocks or a gap that can settle later.
- Put the empty barrel in its final position and check it again. Only then measure the downspout height or mark a diverter location.
University of Maryland’s rainwater-harvesting guidance specifically lists gravel, block, or pavers for stabilizing a tank surface and says loose or soft soils need compaction. Penn State’s rain-barrel construction guide also recommends using sand or gravel to level an area and measuring the downspout after the barrel is on its elevated surface.
Why the final height matters
Raising a barrel can make the spigot easier to use and improve gravity flow to a watering can. It also raises the inlet. If you cut a downspout before the pavers and barrel are in place, the outlet may end up too high, too low, or aimed at the wrong part of the screen.
Set the empty barrel on the finished pad, then check the connection path. For an open-top model, confirm the downspout can discharge over the screened opening without rubbing the lid. For a diverter kit, follow that kit’s measurement instructions and make the mark with the barrel at its final height. The downspout diverter kit guide covers the connection choices; this article is about getting the support below it right.
Test the base before the first storm
Before relying on rainfall, add water gradually with a hose or buckets while watching the pavers and soil around them. Stop if the barrel rocks, a paver tips, or water exposes a soft edge. Empty the barrel and correct the base rather than trying to shim a full container.
Once the support is sound, test the inlet, spigot, and the planned discharge path in a controlled way. A solid base does not eliminate the need for a complete system check; it gives each of those parts a stable reference point. Our stand stability and leveling guide is useful if you are considering a raised stand instead of a low paver pad.
When a gravel-and-paver pad is the wrong choice
Choose a different site or get location-specific advice when the ground is visibly unstable, the barrel would obstruct a required path, or the downspout cannot reach the final inlet without forcing the connection. A pad should not be used to compensate for a poor location.
Also check municipal, utility, and HOA rules before beginning. Some programs specify placement or equipment requirements. The rebates and local-rules guide explains where to look for those requirements before you purchase materials.
FAQ
Can a rain barrel sit directly on gravel?
Not on a thin, loose layer. Build a compacted, level base with a continuous paver or block surface so the barrel does not settle unevenly.
How level does a rain-barrel base need to be?
It should be level and solid in more than one direction before filling. Check the empty barrel after it is in its final position, then recheck as you add a small amount of water.
Should I raise a rain barrel on pavers?
Pavers can improve spigot access and gravity flow, but they also raise the inlet. Put the barrel on the completed pad first, then measure the downspout or diverter connection.