Quick picks
Battery hose timer with manual override
★ Top pick Best timer starting point- Best for: Short rain-barrel watering runs where you can test flow before leaving it unattended
- Check first: Some timers need more pressure than a low barrel provides, so check the product range and return terms.
Low-pressure drip irrigation kit
Best emitter match- Best for: Raised beds, containers, and short rows that can use fewer emitters at lower flow
- Check first: Long runs and many emitters may need a pump instead of gravity.
Inline hose filter with cleanout screen
Best clog prevention- Best for: Keeping grit, roof debris, and algae flakes out of timer valves and emitters
- Check first: A dirty filter can cut flow enough that the timer opens but the bed barely waters.
Rain barrel transfer pump kit
Best when gravity fails- Best for: Longer drip zones, higher beds, or timers that refuse to operate at barrel pressure
- Check first: Use outdoor-rated power practices and avoid overpressurizing drip tubing.
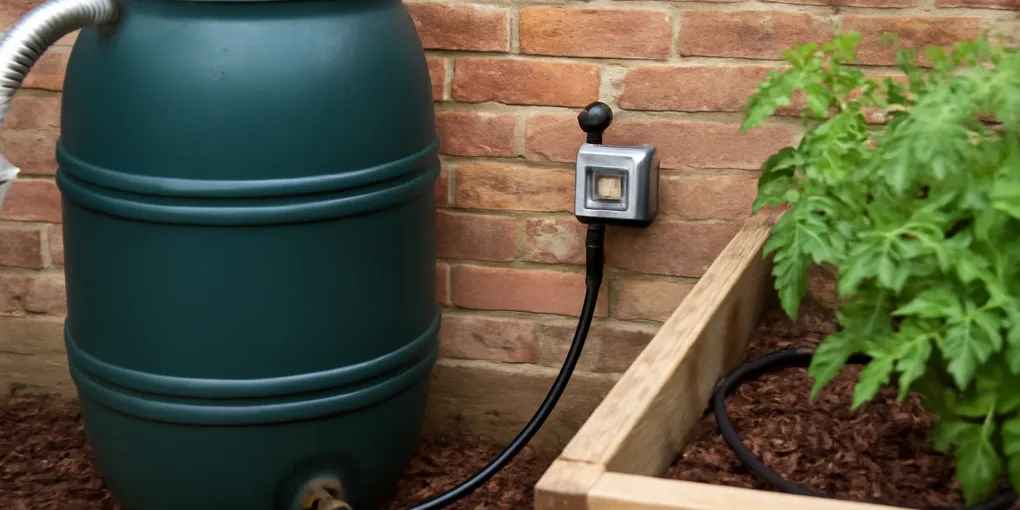
A rain barrel drip irrigation timer sounds like the perfect upgrade: stored roof runoff, a battery valve, and a bed that waters itself while you do something else. The catch is pressure. Many hose timers and drip kits are designed around household hose pressure, while a gravity-fed barrel may have only a small push unless it is raised and full.
That does not mean the setup is impossible. It means the first goal is not buying the fanciest timer. The first goal is building a short, clean, low-restriction test zone that proves water actually reaches the plants when the barrel is half full. Once that works, you can add more tubing, more emitters, or a pump if the site needs it.
Quick picks for a low-pressure timer setup
- Start with a simple battery timer: Search Amazon for battery hose timers with manual override and clear pressure information.
- Use a low-pressure drip layout: Search Amazon for low-pressure drip kits rather than a long high-emitter kit meant for a house spigot.
- Protect the valve: Search Amazon for inline hose filters before debris reaches the timer or emitters.
- Escalate only when testing fails: Search Amazon for rain barrel transfer pumps if gravity cannot open the timer or wet the bed evenly.
For the pressure math behind this protocol, read our rain barrel height calculator and pressure guide. If you are choosing between gravity and powered watering, compare the rain barrel pump drip irrigation pressure setup.
Step 1: decide whether gravity has a fair chance
A barrel sitting directly on the ground has less pressure at the spigot than a barrel on a stable stand. Water height also changes during the run. A timer that opens when the barrel is full may behave differently when the water drops below the top third of the tank.
Before buying parts, check four things:
- The barrel outlet is above the bed or at least above the first section of tubing.
- The stand is stable enough for a full barrel, not just an empty one.
- The watering zone is short, with a modest number of emitters.
- The plants can tolerate slower watering rather than a strong spray.
The EPA WaterSense microirrigation guidance describes drip and microirrigation as targeted watering that can reduce runoff and evaporation when designed well. A rain barrel can support that idea, but only if the low-pressure layout is realistic.
Step 2: put the parts in the right order
For a basic gravity-fed test, use this order:
- Rain barrel spigot or outlet.
- Short hose section with no kinks.
- Cleanable inline filter.
- Battery hose timer.
- Main drip tubing or soaker line.
- Emitters, dripline, or short branches to the plants.
- Flush end or removable cap.
Some installers put the timer before the filter because it is physically convenient. That can work with very clean water, but roof runoff often carries grit, pollen, and organic flecks. A small screen before the timer protects the valve. Keep the filter reachable because a clogged screen can make the system look like a pressure failure.
Search Amazon for inline hose filters
Do not bury the timer or filter under mulch. You need to see leaks, clear debris, and use manual override during testing.
Step 3: choose a timer cautiously
A battery hose timer is convenient because it does not need wiring, but its internal valve still has to open and close reliably. Some timers need more inlet pressure than a low rain barrel can provide. Product pages and manuals often list an operating pressure range; check it before ordering, and keep the packaging until your half-barrel test passes.
Search Amazon for battery hose timers
Useful timer features include manual watering, a rain-delay button, a large screen, and a simple schedule. Wi-Fi and app features matter less than a valve that opens at low pressure. If the timer clicks but the line barely wets, remove the timer and test flow directly. If direct flow works but timer flow fails, the timer is the restriction.
Step 4: keep the drip zone small at first
The first test zone should be almost boring: one raised bed, one short row of containers, or one cluster of thirsty plants. Avoid splitting the barrel into several long branches until you know the flow. Low-pressure drip systems are sensitive to tubing length, elevation changes, clogged emitters, and too many outlets.
Search Amazon for low-pressure drip kits
Use fewer emitters than the kit maximum, then add more if the first run is even. Place a cup under the farthest emitter and one near the barrel. Run the timer for 10 or 15 minutes with the barrel at least half full. If the far cup receives far less water, shorten the run, reduce branches, raise the barrel, clean the filter, or consider a pump.
Step 5: know when to add a pump
A pump is not a failure. It is the right tool when the bed is uphill, the drip zone is long, the timer needs higher pressure, or the barrel is feeding several zones. A small transfer pump can make the system behave more like a hose bib, but it also adds electrical safety, noise, maintenance, and overpressure concerns.
Search Amazon for rain barrel transfer pumps
If you add a pump, check whether the drip kit requires a pressure regulator. Pure gravity usually does not need one because pressure is low. A pump can exceed the tubing or emitter range, especially if the system has few open emitters. Use outdoor-rated equipment, keep connections dry, and do not leave a new pumped setup unattended until you have watched several cycles.
Step 6: set run times by catch-cup testing
Do not copy a timer schedule from a house-spigot drip system. Rain barrel flow changes as the barrel drains. Instead, run the system and measure what reaches the plant zone. Put shallow cups near the first emitter, middle emitter, and far emitter. Run the timer for a known interval, then compare the water collected.
If the cups are nearly even but low, increase the run time. If the near cup is wet and the far cup is nearly dry, the layout is too restrictive for gravity. If all cups start strong and fade quickly, the barrel height or water level may be the limiting factor.
This is also where a level gauge helps. If you cannot see the stored water level from outside the barrel, add a safe sight tube or float indicator after the basic timer test works.
Maintenance checklist before each unattended run
- Confirm the lid and inlet screen are closed to reduce mosquito access.
- Clean the filter screen and flush the drip line end.
- Check that the timer manual override opens water flow.
- Look for leaks at the spigot, timer threads, filter bowl, and tubing adapters.
- Make sure overflow still routes away from the foundation.
- Start with a full or half-full barrel, not the last inch of stored water.
- Turn off the system before freezing weather and drain timer parts.
Rain barrels are useful because they hold water near where you need it. Timers are useful because they reduce forgotten watering. The combined system works only when the parts are matched to low pressure, kept clean, and tested at the water level you actually expect to use.
Rain Barrel Works FAQ
Will every battery hose timer work with a rain barrel?
No. Some need more inlet pressure than a gravity-fed barrel can provide. Check the product range, test with the barrel half full, and choose simple manual controls over smart features if pressure is marginal.
Can I run a whole vegetable garden from one barrel and one timer?
Sometimes, but start with one bed. A 50 or 55 gallon barrel can empty quickly through drip tubing, and long multi-bed layouts often need zoning, higher elevation, or a pump.
Where should the filter go in a timer setup?
Use a cleanable filter before the timer when possible, then flush the drip line after installation. The goal is to keep grit out of the timer valve and small emitters.
Is stored roof runoff safe for edible plants?
Use local guidance and avoid overhead watering on edible leaves. Many extensions frame rain barrels as outdoor, nonpotable water sources, and roof materials, animal waste, and debris can affect water quality.
Sources
- EPA WaterSense: Microirrigation
- EPA: Soak Up the Rain - Rain Barrels
- University of Minnesota Extension: Rain barrels
- Penn State Extension: Rain Barrels
Frequently Asked Questions
- Sometimes. It depends on the timer valve, the barrel height, water level, filter condition, tubing length, and emitter count. Test the exact setup before trusting it for unattended watering.
- Put a coarse or cleanable filter before the timer when possible so debris does not jam the valve. Add emitter-level filtration only if the kit calls for it.
- Usually not for pure gravity because pressure is already low. You may need a regulator if a pump is added or if the drip kit requires a specific maximum pressure.
- Time it with a catch-cup test. Low-pressure drip can deliver water slowly, and a half-empty barrel may flow much less than a full one.