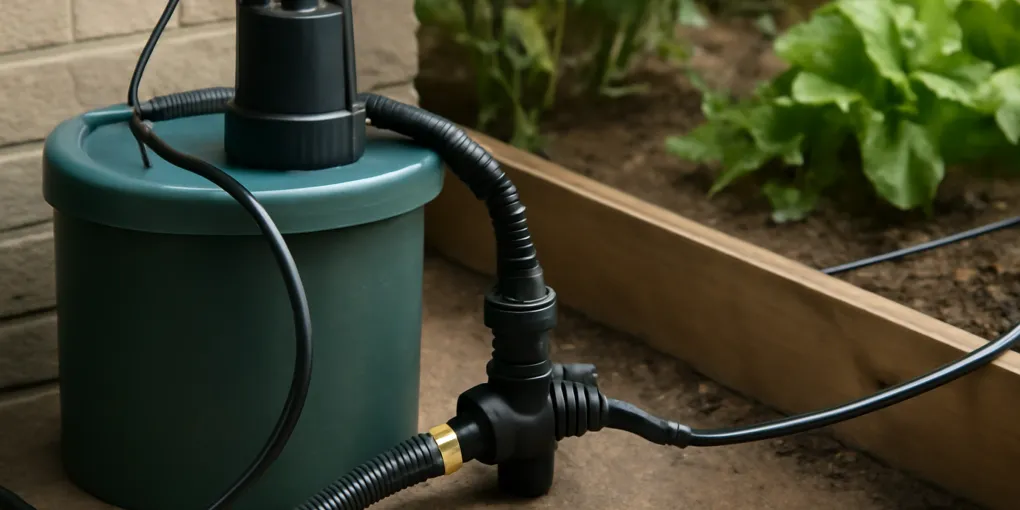
How to Add a Rain Barrel Pump for Drip Irrigation Without Overpressuring the System
ProtocolQuick picks
Rain barrel transfer pump for garden watering
★ Top pick Best pressure boost- Best for: Moving water from a barrel to drip tubing, a short hose run, or raised beds above the spigot
- Check first: Use only outdoor-rated equipment and follow the pump manual around water and electricity.
Low-pressure drip irrigation filter and regulator kit
Best emitter protection- Best for: Protecting emitters from roof grit and keeping pressure within the drip system's rating
- Check first: Some regulators need more inlet pressure than a tiny pump or gravity barrel can provide.
Outdoor GFCI extension cord and weatherproof connection cover
Best electrical safeguard- Best for: Temporary pump setups where the outlet, plug, and cord connection need weather-aware protection
- Check first: Do not leave non-rated cords or plugs in standing water, puddles, or uncovered rain exposure.
A pump can make a rain barrel much more useful for drip irrigation, but it also adds new failure points. Gravity-fed barrels are gentle and slow. A pump can push water through longer tubing, up to raised beds, or through a filter, but it can also clog, overpressure fittings, drain the barrel too quickly, or create an electrical hazard if the setup is casual.
The practical goal is not maximum pressure. It is controlled, filtered, low-pressure flow that your drip tubing and emitters can handle. Start with the barrel water quality, then choose the pump, filter, regulator, timer, and discharge layout as one system.
Quick picks
- Need more reach or lift: Search Amazon for rain barrel transfer pumps sized for garden watering, not household pressure boosting.
- Need emitter protection: Search Amazon for low-pressure drip filter regulator kits before connecting roof-water storage to small emitters.
- Need safer temporary power: Search Amazon for outdoor GFCI cord covers and follow the pump manual, outlet rating, and local electrical rules.
For lower-tech alternatives, see our guides to rain barrel height and water pressure, connecting a rain barrel to a garden hose, and rain barrel filters for clogged emitters.
What matters most in a pump-fed drip setup
Use the pump manual as the limit, not the marketing headline. Check pressure range, flow rate, duty cycle, priming requirements, and whether the pump can run safely with a partly empty barrel. Add a cleanable filter before small emitters, and keep every electrical connection protected by GFCI and weather-rated covers or enclosures.
A safer layout makes failure visible. Favor shutoff valves, accessible unions, pressure regulation when needed, and overflow routing that still protects the foundation if a filter clogs, a fitting separates, or the pump stops mid-cycle.
Step 1: decide whether you really need a pump
Use a pump when gravity cannot do the job. Common reasons include raised beds above the barrel spigot, a long hose run, a filter that needs more pressure, drip zones that water unevenly, or a garden that is too far from the downspout. If the barrel sits high on a stable stand and the drip run is short, gravity may be simpler and safer.
Do not add a pump just to make a rain barrel feel like a hose bib. A standard barrel holds limited water. EPA WaterSense outdoor-water guidance is a good reminder that efficient watering still depends on plant need, weather, and soil, not only on hardware.
Step 2: choose a pump by flow and duty cycle, not hype
For drip irrigation, look for modest garden-transfer flow, outdoor suitability, and clear manual limits. You need enough flow to fill the drip line and feed the emitters, but not so much pressure that tubing, barbed fittings, or filters separate. Avoid pumps marketed only for emergency water transfer if the manual does not explain continuous use, outdoor use, or garden-hose connections.
Search Amazon for rain barrel transfer pumps
Check whether the pump is submersible or external. A submersible pump sits in the barrel and needs debris clearance, a safe cord route, and an intake that will not suck up bottom sludge. An external pump stays outside the barrel and needs a primed intake line, leak checks, and protection from rain unless the manufacturer rates it for exposure.
Step 3: filter before the smallest parts
Roof runoff brings grit, pollen, shingle particles, leaf bits, insect debris, and algae film into the barrel. Drip emitters have small openings, so a pump can move clogging debris faster than gravity. Put a cleanable inlet screen at the barrel, then use an inline filter before the drip zone.
Search Amazon for low-pressure drip irrigation filters
Place the filter where you can actually open it. If cleaning requires moving the barrel or crawling behind shrubs, it will not happen often enough. After the first few watering cycles, open the filter and inspect the screen. A dirty filter after one run means you need better inlet screening, a first-flush approach, or more frequent barrel cleaning.
Step 4: keep pressure inside the drip system’s limits
Many drip systems are designed for low pressure, often with a regulator when connected to municipal water. A rain-barrel pump can still exceed what small tubing and emitters tolerate, especially if the pump outlet is restricted by a closed valve or a short zone. Read the tubing, filter, and pump ratings together.
Search Amazon for low-pressure drip regulator kits
Some pressure regulators need a minimum inlet pressure to work correctly. If your pump is very small, a regulator may not behave like it does on a house spigot. In that case, use a pump with a reasonable flow curve, keep zones short, and test pressure by watching fittings, emitter output, and pump cycling rather than assuming the label solved it.
Step 5: build one short test zone first
Before connecting every bed, build one zone with a filter, regulator if needed, mainline, a few emitter branches, and an end flush point. Fill the barrel, run the pump for a short cycle, and watch the entire line. Look for fittings that weep, emitters that spit, tubing that jumps, and a pump that runs dry or cycles rapidly.
Flush the end of the line into a bucket before adding final emitters. This clears installation debris and shows whether sediment is moving through the system. If the bucket water is gritty, stop and improve filtration before you bury or mulch the tubing.
Step 6: use timers carefully
A timer can be useful, but a rain barrel is not an endless supply. A timer that works on a house spigot can drain a barrel, run a pump dry, or water during a storm if it is not matched to storage volume. Start with short manual cycles and measure how much the water level drops.
If you add a timer, choose one that is compatible with your pump setup and does not trap pressure in a way the pump manual forbids. Some pumps should not run against a closed valve. Some timers need pressure to open correctly. Do not assume every hose timer works well downstream of a small rain-barrel pump.
Step 7: protect electrical connections
Water and electricity deserve a conservative setup. Use a GFCI-protected outlet, outdoor-rated cords, drip loops, and weatherproof covers where appropriate. Keep plugs and cord connections off the ground and away from puddles, splash zones, and barrel overflow. The Electrical Safety Foundation International explains that GFCIs are designed to reduce shock risk by shutting off power when a ground fault is detected, but they do not make sloppy wet connections acceptable.
Search Amazon for outdoor GFCI extension cord covers
Follow the pump manual over any garden shortcut. If the manual says indoor use only, do not use it beside a barrel. If it requires a specific outlet, cord size, or dry placement, treat that as part of the system design. Unplug before cleaning the intake or reaching into the barrel.
Step 8: plan for overflow and dry-run failure
A pumped system still needs normal barrel drainage. The overflow hose must work when the pump is off, when the filter clogs, and when the barrel fills during a storm. Keep the overflow route separate from the pump discharge so one failure does not hide another.
Dry-run protection matters too. If the pump can run when the barrel is empty, use a pump with automatic shutoff, a float switch, or a strict manual routine. Running dry can damage the pump and can leave a timer-controlled system looking fine while nothing reaches the plants.
Maintenance schedule after setup
After the first week, clean the inlet screen and inline filter. Check each emitter zone for uneven output. Inspect the pump intake for leaves or algae. Tighten only the fittings that actually leak; overtightening plastic threads can create cracks that show up later.
Monthly during the watering season, rinse sediment from the barrel bottom if the outlet is pulling dirty water, confirm the overflow route is clear, and test the GFCI according to the outlet or device instructions. Before freezing weather, disconnect and drain pump parts, hoses, filters, timers, and any low spots that can hold water.
FAQ
How much pressure do I need for rain-barrel drip irrigation?
You need enough pressure to feed the specific drip layout, not a household-hose feel. Short, low-flow zones may work with gravity. Longer runs, filters, or raised beds may need a small pump, but the tubing, filter, and regulator ratings should set the limit.
Can I connect a pump directly to drip tubing?
Sometimes, but a filter is usually needed between stored roof water and small emitters. A regulator may also be needed if the pump can exceed the drip system’s pressure rating. Test a short zone before connecting the whole garden.
Will a hose timer work with a rain barrel pump?
Only if the timer, pump, and pressure range are compatible. Some timers need steady pressure to open, and some pumps should not run against a closed timer valve. Start manually and add automation only after you know the flow rate and barrel drawdown.
Where should the pump sit in the barrel?
Keep a submersible pump slightly above the dirtiest bottom sediment and away from the inlet splash zone. Use a cleanable intake screen if the manufacturer allows it. For an external pump, keep the intake line primed and leak-free.
What is the biggest safety issue with pump-fed rain barrels?
Electrical exposure around wet ground is the biggest safety issue. Use GFCI protection, outdoor-rated equipment, weather-aware cord management, and the pump manual’s instructions. Also keep overflow water away from outlets and cord connections.
Sources
- EPA WaterSense, Outdoor Water Use in the United States
- Rutgers Cooperative Extension, Rain Barrels
- Penn State Extension, Rain Barrels
- Electrical Safety Foundation International, Ground Fault Circuit Interrupters