Quick picks
FCMP Outdoor Raincatcher 4000 Rain Barrel
★ Top pick Best matched-barrel starting point- Use Case: Starting a matched two-barrel setup with documented linking hardware
- Best For: A flat-wall installation where two 24-inch-deep barrels fit on one stable base line
- Watch For: Confirm the current listing includes the linking parts and leave room for both overflow and watering access
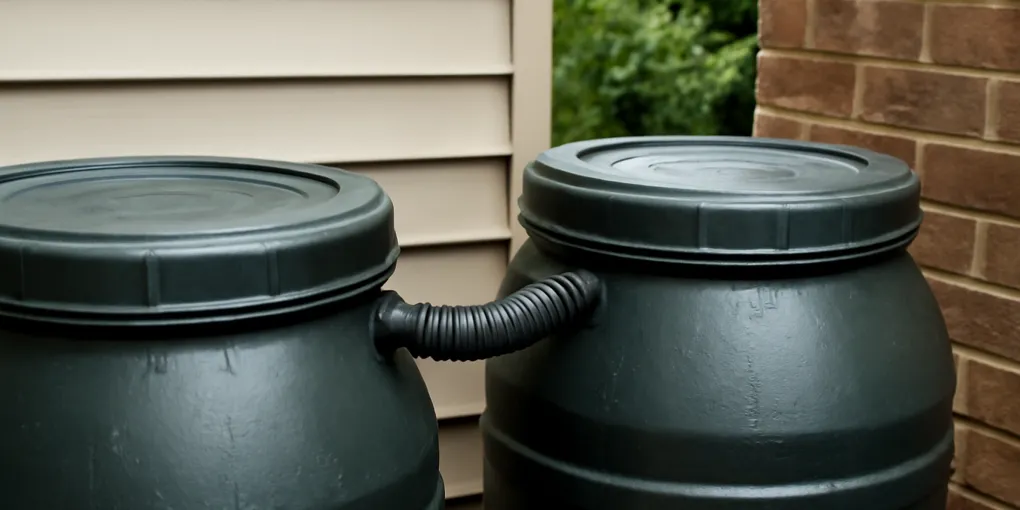
Connecting two rain barrels is not just a way to double the number printed on the side of a container. It changes the water path. One barrel receives roof runoff first; the connector must move water to the second barrel fast enough to balance the system; and the final overflow still needs to leave the house area safely.
The most reliable two-barrel projects start with matching equipment, equal-height bases, and a hose-fill test. The least reliable start with an extra barrel placed on a few loose blocks and a connector installed only after the first barrel is already full. If you are deciding whether one larger storage unit would suit the yard better, compare the tradeoffs in our rain barrel versus underground cistern guide.
Top pick for a matched two-barrel setup
- Matched barrel system: See current FCMP Raincatcher 4000 options when a documented matching barrel and linking hardware suit the space. FCMP lists linking hardware for the RC4000, but check the current contents before buying because seller bundles can vary.
Buy the linked-barrel hardware for the barrel system first. An overflow extension is only an accessory after you have measured the outlet, confirmed the discharge route, and tested where its end will sit; it is not a substitute for a compatible connection or safe grade.
Choose a link layout that has one clear job
A low equalizing connection is meant to share stored water. When water enters the first barrel, the water level can move through the low connection into the second barrel until the two water surfaces approach the same height. That arrangement is useful when both barrels are the same type and their connection ports are designed to match.
An upper link or dedicated overflow connection has a different job: move excess water after a barrel reaches its designed full level. It may not keep the working water levels equal, especially if the hose is narrow, kinked, or installed above the usable storage level. Read the barrel and kit instructions for the actual ports. Do not assume an opening intended for a spigot, screen, or optional accessory can safely carry a linking load.
For a homeowner adding a second barrel to an existing one, a matched kit is usually less risky than drilling two unverified shells. The connection height, gasket, thread, and hose diameter all matter. A slow seep at a low port can soften the base under hundreds of pounds of stored water.
Level both barrels before connecting anything
Set the empty barrels in their final positions and check front-to-back and side-to-side level on each base. A two-barrel system should not rely on one taller stand because the taller barrel looks easier to fill. With a simple equalizing link, height differences can leave one container taking most of the water while the other remains partly empty.
Each full 50-gallon barrel weighs more than 420 pounds including its shell and hardware. The base must support the full footprint of each barrel without rocking, sinking, or placing pressure on only a few ribs. Pavers, gravel pads, and platforms can work when installed for the load, but loose masonry blocks and sloped soil create a moving target.
Leave room to inspect the connector. You should be able to see whether a hose kinks behind the barrels, whether a fitting drips, and whether a closed spigot is accidentally blocking a shared path. Also leave access for the lid or screen, the watering outlet, and the overflow connection. A two-barrel line tight against siding can be hard to maintain even if it technically fits.
Match the ports and link height
Before cutting hose or drilling, place both barrels so the intended ports are at the same elevation. Measure from the ground or base surface to the center of each port, not from the top lip of the barrel. A small difference in base height can matter more than a connector that appears level by eye.
Use fittings made for the port style and material. Tighten gasketed bulkhead fittings according to the maker’s instructions; overtightening plastic can crack the wall. Support the hose so its weight does not pull down on a fitting when it fills. Avoid sharp bends that flatten the inside of flexible tubing.
If you are linking a barrel that uses an open screened top with another design that uses a sealed side-fill diverter, stop and check the documentation. The two systems may have different full-barrel behavior. Connecting them without a shared overflow plan can send water over a lid, toward the wall, or through a fitting that was never meant to be an overflow outlet.
Test equalization with a hose, not a storm
Close watering outlets that are not part of the link, open any valves the linking kit requires, and add a small amount of water to the first barrel. Watch the connector. The second barrel should begin to receive water without a drip at either fitting.
Continue in stages. After each stage, compare the visible water level or sight tube on both barrels. A short delay can be normal, but a large persistent difference points to a kink, closed valve, blocked port, or link that is too restrictive for its job. Do not wait for a thunderstorm to reveal that the first barrel has filled while the second remains nearly empty.
Once the water sharing behaves as expected, move to the overflow test. Add water until the system reaches the designed high-water path. Watch the discharge from the beginning to the end: it should move away from the foundation, basement openings, stands, walkways, and neighbor property. The overflow away from foundation guide gives a route-specific checklist.
Build an overflow route for both-full conditions
Two linked barrels delay overflow; they do not remove it. A roof can supply far more water than 100 gallons in one storm. The final discharge point needs stable ground, enough fall to move water away, and no path across a door, sidewalk, or patio that slopes back toward the house.
Secure a flexible extension during the hose-fill test so it cannot flip toward the wall under flow. Then inspect it again after the first real storm. Leaves, mulch, and shifted pavers can change where water lands. If the route crosses compacted clay or an area that ponds, do not solve that by simply making the hose longer; use the site checks in our rain barrel overflow in clay soil protocol.
Common failures to correct before rain
- One barrel fills much faster: Recheck base level, port height, hose kinks, and valves. A connector cannot equalize through a closed or crushed path.
- Water leaks at the low connection: Drain below the fitting before adjusting it. Do not tighten a fitting under full-barrel load.
- The second barrel never receives water: Confirm the link actually serves as an equalizer rather than an overflow-only hose.
- Both barrels fill but discharge near the house: Reroute the final overflow before the next storm. Extra capacity is not a safe overflow plan.
- The base settles after filling: Disconnect the downspout, drain safely, and rebuild the support. Do not shim a loaded barrel with loose material.
A final two-barrel check
A linked setup is ready only when both empty barrels are stable, their intended ports align, water moves through the connection without leaks, and a full-system overflow test reaches a safe route. Take a photo of the finished connector and note which valves should be open during collection. That small record is useful when winterizing or reconnecting after maintenance.
For a simple garden setup, two matching barrels on level bases with accessible parts are usually better than a larger improvised chain. The capacity is valuable only if the water can share predictably and leave safely when the storage is full.
Sources
- University of Minnesota Extension: rain barrels
- University of Maine Cooperative Extension: rain barrels
- Virginia Cooperative Extension: stormwater management for homeowners, rain barrels
Connected rain barrel FAQ
Can I connect two rain barrels at different heights?
A simple equalizing connection works best with both barrels level and matching port heights. If the bases differ, one barrel may fill or drain first. Use a layout specifically designed for the height difference rather than improvising a low connecting hose.
Should rain barrel linking hoses connect at the top or bottom?
Use the port and layout specified by the barrel or linking-kit documentation. Low connections can share working water; upper routes may be intended only for excess water. Those are different jobs.
Why does one linked rain barrel overflow while the other is not full?
Check for a sloped base, mismatched port elevations, a blocked connector, a closed valve, or a hose that has kinked behind the barrels. Test with a garden hose in stages to identify the restriction.
Do two rain barrels need separate overflow hoses?
Follow the manufacturer instructions for the exact setup, then test the final full-barrel route. Whether it is one designed shared route or two separate routes, the discharge must handle the moment both barrels are full.
Frequently Asked Questions
- They can be connected only if the link layout is designed for the height difference, but a simple equalizing link works best when both barrels sit level and the connection points line up. Different base heights can make one barrel fill or drain first.
- The correct location depends on the barrel's documented ports and kit. A low equalizing connection shares stored water; an upper connection may be used for overflow. Do not drill or connect ports that the barrel manufacturer does not support.
- The usual causes are an uneven base, a kinked or undersized link, mismatched port heights, a blocked connector, or a system that routes incoming water into one barrel faster than the link can equalize it.
- Plan the full-barrel overflow path before installation. Some matched systems use a designed shared route, while others need each barrel protected. Follow the barrel or linking-kit instructions and test with a hose before relying on storm runoff.