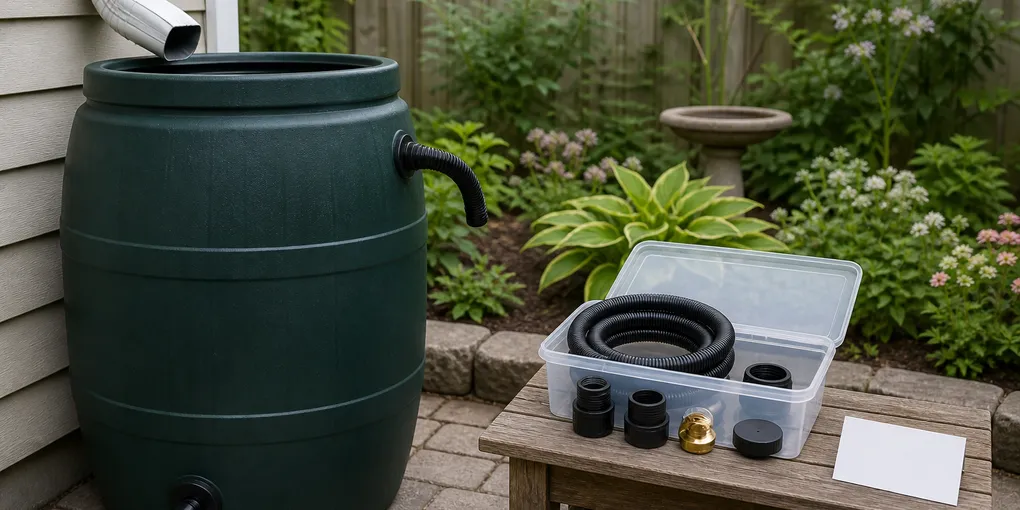
Make a One-Card Inventory for Rain-Barrel Parts
ProtocolIf a rain barrel comes apart for storage or a hose route changes, the small pieces are easy to lose long before the barrel itself is forgotten. The simplest fix is one barrel-specific card: record the three connection points, list what comes off, and name the one bin, bag, or shelf where those parts live.
This is not a maintenance log. It is a retrieval note for the next setup, when a black cap and a black adapter can look interchangeable on a garage shelf. Keep the card with the stored parts or photograph it after each update.
Start with the barrel, not the loose parts
Give the card a plain identifier that matches a place you can find: north downspout, shed barrel, or patio barrel. Add a photo if more than one barrel looks alike. The label is not a serial-number project; it is the first clue that keeps parts from drifting between systems.
Then write the three interfaces that matter when the barrel goes back into service:
- Inlet: where water enters, such as the lid opening, screened port, or diverter hose connection.
- Outlet: the spigot or threaded outlet where a garden hose, short leader hose, or cap attaches.
- Overflow: the fitting and hose route that carry excess water away once the barrel is full.
Those three lines make a good first check because they describe the parts most likely to be removed, re-routed, or confused with a similar fitting. EPA describes rain barrels as containers that collect roof runoff for later landscape use; that basic purpose is why an inlet and an outlet belong on every card. Rain Brothers also illustrates the range of parts that can appear in a rainwater-harvesting system, from downspout filters to pipe fittings.
Copy this one-card layout
Use a 4-by-6 card, the notes app on a phone, or the back of a storage-bin label. The point is to keep only the details that reconnect the barrel.
| Card line | What to write | Example of a useful detail |
|---|---|---|
| Barrel location | The fixed place or downspout it serves | North corner beside the shed |
| Inlet interface | Opening shape and the part that meets it | Round screened lid; short diverter hose |
| Outlet interface | Thread or connector description | Spigot with a hose-thread cap |
| Overflow interface | Fitting and the removable route | Side outlet; black corrugated hose |
| Removable parts | Each loose item, one per line | Cap, adapter, washer, connector |
| Storage location | One named home for all listed parts | Clear bin on the garage shelf |
| Last checked | Date and a brief change note | Aug. 30: cap returned to bin |
If an adapter has a size marking, copy it exactly. If it does not, photograph the adapter beside the connection it fits rather than guessing from memory. A card can remind you which pieces belong together; it cannot establish that a part from another system will fit.
List parts by their job
Avoid a long list of colors and vague nouns such as black fitting or small cap. Give each loose part a job name first, then add the marked size, thread description, or hose diameter when one is present. A 3/4 inch garden-hose-thread cap and a 1 inch barbed overflow adapter are much more useful than cap and adapter; copy those details only from the part or its manufacturer documentation. For example:
- overflow-hose adapter — black, wide threaded end;
- spigot cap — round, black, stored with outlet washer;
- short leader hose — connects diverter to lid inlet;
- garden-hose connector — brass, stored in the bin lid;
- screen clip — two pieces, taped inside the bin.
The job name matters when a replacement is needed. It tells you whether the missing item belongs at the water-entry point, the watering outlet, or the overflow. Put paired pieces on the same line—such as a cap and its washer—or write two screen clips when the inlet needs a pair, so the inventory does not imply that either one is complete by itself.
Give every barrel one storage home
The storage line is the part that turns a list into a useful card. Choose one dry, reachable home for the removable pieces: a labeled bin, zip bag, hook, or shelf compartment. If two barrels share a shelf, give each its own container or attach its card to the container.
Return parts to that home as they come off. A hose can stay with the barrel if it is not removed, but a cap, adapter, washer, or screen clip should not become a separate errand. Before setting the system up again, bring the card to the barrel and check each line as the part is found.
Update the card at the moment something changes
Do not wait for a full seasonal review. Cross out a part that is discarded, add a replacement when it arrives, and change the storage line the day a bin moves. One short update is easier to trust than a detailed card that still points to last year’s shelf.
The useful boundary is compatibility: this card records what was attached to a particular barrel, but it does not prove a replacement will fit or work safely. Confirm a new adapter, hose, or fitting against the barrel or component manufacturer’s information before relying on it. For general context on rain barrels and rooftop runoff, see the U.S. EPA’s rain-barrel resource; its page notes that the material is no longer updated.
Sources
Rain barrel parts inventory FAQ
What should go on a rain-barrel parts inventory card?
Record the barrel location, each water interface, the removable pieces, and one storage location. Add a photo for an unusual connection instead of relying on a color description.
Should each rain barrel have its own parts card?
Yes. A card tied to one barrel prevents parts from moving between similar setups without a record of where they belong.
How often should I update a rain-barrel inventory?
Update it whenever a removable part or storage location changes, then do a quick read-through before the next setup.
Frequently Asked Questions
- Write the barrel location, the inlet, outlet, and overflow interfaces, each removable part, and the one place those parts are stored. A photo is useful when an interface has an unusual shape.
- Yes, when barrels use different adapters, hose routes, or fittings. One card per barrel keeps a cap or adapter from being assumed compatible simply because it came from a similar-looking setup.
- Update it whenever a removable hose, cap, adapter, or connector changes. A quick check before a seasonal setup can catch a part that was stored elsewhere.