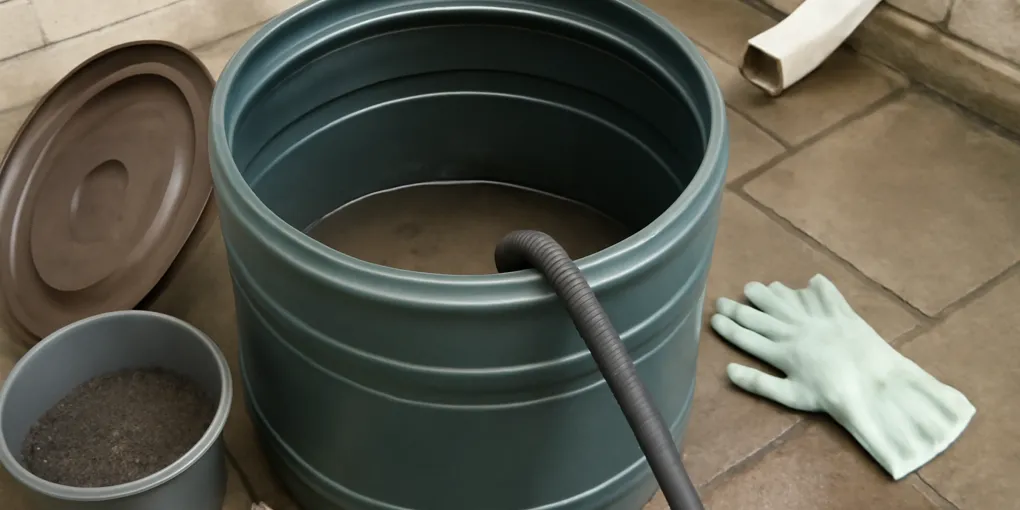
How to Remove Rain Barrel Sediment Without Tipping the Barrel
ProtocolQuick picks
Compact wet/dry vacuum with 1.25-inch hose
★ Top pick Best for a fixed barrel with a wide lid- Use Case: Removing the last puddle and loose grit through a lid opening after gravity draining
- Best For: Barrels that cannot be tipped and have at least a 4-inch service opening
- Watch For: Wet pickup rating, hose reach, stable GFCI-protected power, and tank capacity
Nylon bottle brush and flexible tube-brush set
Best for spigots and fittings- Use Case: Loosening wall film and cleaning the outlet passage without scratching plastic
- Best For: Routine cleanouts with light sediment and accessible lids
- Watch For: No exposed wire tips, no kitchen reuse, and a brush narrow enough for the outlet
Rain barrel sediment collects below the spigot, exactly where normal draining cannot reach it. Roof grit, pollen, leaf fragments, and dust settle into that dead space. Once the layer is thick enough, it can slow the outlet, send grit into drip tubing, and make the last water smell stale. This focused cleanout fits between the broader checks in our rain barrel seasonal maintenance schedule.
You do not need to roll or tip a full barrel to remove it. Drain the usable water first, isolate the downspout, remove the last puddle through a bottom drain, siphon, scoop, or wet/dry vacuum, then loosen and capture the remaining solids. The right method depends on the barrel’s service opening and whether it has a low drain.
Quick picks
- For a fixed barrel with a removable lid: choose a compact wet/dry vacuum explicitly rated for wet pickup, with a hose narrow enough to reach the floor and a tank you can lift safely when full.
- For the outlet and wall seam: choose a long soft-nylon bottle brush plus a narrow flexible tube brush, both without exposed wire tips.
- For a barrel with a bottom drain: use the model’s existing plug and gasket with a bucket; do not buy a generic drain fitting unless the manufacturer gives the required hole and thread dimensions.
Choose the cleanout method by barrel design
| Barrel access | Best sediment method | Minimum useful tool access | Main caution |
|---|---|---|---|
| Removable wide lid | Scoop plus soft brush, or compact wet/dry vacuum | Hand or 1.25-inch vacuum hose | Do not lean into an unstable barrel or leave the opening unattended. |
| Small service cap | Siphon or wet vacuum with a narrow wet-rated hose | Roughly 1.25 inches, depending on fittings | Never force a hose past a screen or internal part. |
| Bottom drain or cleanout plug | Gravity flush into a bucket, followed by a rinse | Correct wrench or hand access for the plug | Support the fitting so the barrel wall does not twist. |
| Sealed side-fill barrel with no service opening | Follow the maker’s drain and cleaning instructions | Model-specific | Do not cut a new access hole merely to make cleaning easier. |
A wide lid makes a compact wet/dry vacuum the cleanest option for a fixed barrel. A low drain is faster when the sediment is loose enough to flow. A scoop is adequate for thick sludge, but only after nearly all water is gone.
Search Amazon for compact wet/dry vacuums with a 1.25-inch hose
Choose a vacuum explicitly rated for wet pickup. The hose must reach the barrel floor without pulling the machine toward the opening. Keep the vacuum on dry, level ground and use a GFCI-protected outdoor receptacle according to its manual. If safe power placement is not possible, use a manual siphon or scoop instead.
What you need
- waterproof gloves and eye protection for splash and grit;
- two buckets, one for reusable clear water and one for dirty sediment water;
- a soft nylon bottle brush or long-handled barrel brush with no exposed wire;
- an old plastic scoop for thick settled solids;
- a wet/dry vacuum, siphon hose, or the barrel’s bottom drain;
- a garden hose with a shut-off nozzle for a low-volume rinse; and
- replacement outlet washer or screen only if inspection shows damage.
Do not use a kitchen brush and then return it indoors. Do not use a wire wheel, pressure-washer tip, or sharp scraper on a polyethylene barrel. Scratches trap more residue, while a pressure jet can damage screens and gaskets.
Step 1: Disconnect collection and use down the water
Pick a dry period. Set a downspout diverter to bypass, or move the downspout outlet away from the screened lid, before opening the barrel. A surprise shower during cleaning can send roof debris and water into an open work area.
Use the stored water on established ornamental plants or another locally appropriate non-potable use until flow stops at the spigot. Do not deliberately flood one plant bed just to empty 50 gallons. Spread watering over several areas or drain in stages.
If water has an unusual chemical or petroleum odor, visible sheen, or suspected contamination from roof work, do not spread it through an edible garden. Follow local disposal guidance and the barrel manufacturer’s contamination instructions.
Step 2: Capture the water below the spigot
The outlet often sits several inches above the floor. That protects hoses from immediate grit but leaves a bottom reservoir.
With a bottom drain: place a bucket below the drain, hold the external fitting so it cannot twist the barrel wall, and open the plug slowly. Stop if the gasket rotates or the plastic around the port flexes.
With a siphon: fill and start a manual siphon according to its instructions, keep the discharge end lower than the barrel floor, and direct the water into a bucket or suitable vegetated area. Never start a siphon by mouth.
With a wet/dry vacuum: remove the dry filter if the vacuum manual requires it, install the wet-pickup configuration, lower only the hose into the barrel, and collect the last water in short passes. Stop before the vacuum tank reaches its wet capacity.
A 10-gallon dead space can overfill a small vacuum quickly. Use the spigot first; the vacuum is for the last puddle and grit, not the whole barrel.
Step 3: Remove loose sediment before scrubbing
Once the bottom is visible, remove loose material before adding rinse water. Vacuum dry-loose grit, or lift thick sludge with a plastic scoop into the dirty-water bucket. This prevents a small sediment layer from becoming a full barrel of muddy rinse water.
Pay attention to the outlet well. Grit often forms a crescent immediately below or behind the spigot. Do not push a screwdriver through the outlet. Remove the hose, open the valve over a bucket, and use a narrow nylon tube brush from the accessible side only if the barrel’s design allows it.
Search Amazon for long nylon bottle and flexible tube-brush sets
The useful kit has one soft long brush for the wall and a smaller flexible brush for the outlet passage. Avoid exposed wire ends that can score plastic or puncture a screen.
Step 4: Rinse low, not full
Add only two or three gallons of clean water. Brush the bottom seam, the area under the outlet, and any removable screen support. Pull that rinse out with the same drain, scoop, or vacuum method. Repeat once if grit remains.
A low-volume rinse tells you whether the barrel is clean without producing dozens of gallons of disposal water. The goal is to remove loose sediment and film, not make the inside look factory-new. A faint stain on polyethylene is less important than free-flowing fittings, no loose sludge, and no strong odor.
Routine sediment cleaning generally does not require bleach, detergent, or fragrance. Soap residue can be difficult to rinse from a 50-gallon shell. If the barrel held contaminated runoff or has persistent growth, use the exact cleaning method from its manufacturer or local extension guidance rather than improvising a chemical dose.
Step 5: Inspect the parts sediment can damage
Before closing the lid, inspect five places:
- Spigot passage: open it over a bucket and confirm the stream is clear of grit.
- Bulkhead gasket: look for twisting, cracks, or wetness around the barrel wall.
- Bottom drain: clean its threads and reinstall the gasket in the original orientation.
- Inlet screen: replace mesh that is torn, brittle, or separated from its frame.
- Overflow port: remove leaf fragments and confirm the hose is not holding a sediment plug.
Hand-tighten plastic fittings according to the product instructions. Extra force can distort a gasket and turn maintenance into a leak repair.
Step 6: Dispose of sludge without moving it downstream
Let the dirty bucket settle. Decant relatively clear water onto a suitable vegetated area that can absorb it, away from the foundation, wells, surface water, and property lines. Bag the concentrated grit and leaf sludge for household trash or another locally approved disposal path.
Do not pour the bucket into a street inlet or storm drain. Those drains commonly discharge without wastewater treatment, so moving roof grit and concentrated organic sludge into the inlet defeats the point of on-site stormwater management.
Do not add roof sediment to vegetable compost when the roof material, coatings, nearby traffic deposition, or prior barrel contents are uncertain. The quantity is small enough that conservative disposal is easy.
Step 7: Reassemble and run a controlled leak test
Close the drain, reinstall the screen, and reconnect the spigot hose. Add five gallons of clean water through the inlet. Check the bottom plug, spigot bulkhead, hose connection, and barrel base for ten minutes before reconnecting the downspout.
Open the spigot into a white bucket. A few isolated particles after cleaning are normal, but a steady stream of grit means sediment remains near the outlet. Repeat a small rinse rather than sending that grit into drip emitters.
Finally, reconnect the collection path and confirm the overflow hose still runs downhill away from the foundation. Cleaning often moves a barrel or hose just enough to create a new low spot.
When cleaning is not enough
Replace or repair parts when:
- the barrel wall is cracked or sun-brittle;
- the bottom drain spins in an enlarged hole;
- a gasket remains wet after correct reseating;
- the screen cannot be secured against insect entry;
- an odor returns immediately after rinsing; or
- unknown chemicals, roof coatings, or ash may have entered the barrel.
A clean interior cannot compensate for a failing shell or an unidentifiable contaminant. Keep the barrel out of service until the source is understood.
Sources
- Nebraska Extension, Stormwater Management: Rainwater Harvesting with Rain Barrels
- Virginia Cooperative Extension, Stormwater Management for Homeowners: Rain Barrels
- New Jersey Agricultural Experiment Station, Rain Barrels
- EPA, Soak Up the Rain: Rain Barrels
Frequently Asked Questions
- Inspect the bottom at least at midseason and before winter shutdown. Clean sooner if the spigot carries grit, flow falls, odor develops, or a visible layer covers the bottom.
- No. Keep concentrated sediment, roof grit, and dirty wash water out of storm drains. Collect solids and discharge the remaining water to a suitable vegetated area away from foundations, wells, and waterways, subject to local rules.
- Routine sediment removal usually needs draining, physical removal, and rinsing rather than improvised chemical treatment. Follow the barrel manufacturer's cleaning instructions if odor or contamination requires more than a rinse.
- Spigots are commonly mounted above the floor to leave clearance and avoid pulling settled grit into the hose. Use a bottom drain, siphon, scoop, or wet/dry vacuum for the last water instead of forcing the barrel onto its side.
- Only if the manufacturer permits it and every hose and fitting is disconnected. Even an apparently empty barrel can hold several gallons. For a fixed barrel, a low-volume rinse removed by its drain, a siphon, a scoop, or a wet/dry vacuum avoids stressing the spigot and stand.
- No. A close pressure jet can cut screens, disturb gaskets, and score plastic. Use a soft nylon brush and a few gallons of rinse water for better control.