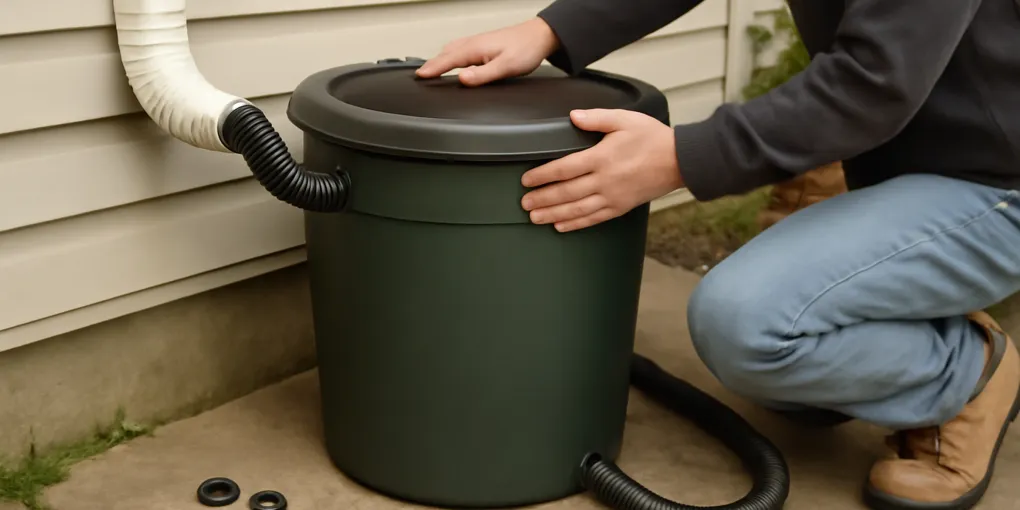
Rain Barrel Spring Startup Checklist: Reconnect, Rinse, and Test Before the First Storm
ProtocolQuick picks
Garden hose washer assortment
★ Top pick Cheap leak fix- Use Case: Replacing flattened washers at spigots, diverter hoses, and short garden hoses
- Best For: Stopping slow startup leaks before they soak a barrel stand
- Watch For: Rubber size, screen washers for debris, and enough spares for hose ends
Flexible downspout extension
Overflow backup- Use Case: Routing bypass or overflow water away from the foundation during spring storms
- Best For: Temporary testing, rental-friendly layouts, and yards that need seasonal adjustment
- Watch For: Length, outlet direction, freeze cracks, and whether it stays put in heavy rain
Spring startup is when small rain barrel problems are easiest to fix. A missing washer, clogged inlet screen, tilted stand, or cracked overflow hose is annoying on a dry afternoon. The same problem during the first hard storm can send water down the siding, across a patio, or into a basement window well.
The goal is not to reconnect every part as fast as possible. The goal is to rebuild the water path from roof to barrel to overflow, then test it before the weather does. If you are planning a new installation, read our rain barrel location checklist and overflow away from foundation guide first.
Quick picks
- Replace washers before chasing bigger leaks. Old hose washers flatten, crack, or disappear during winter storage. Search Amazon for hose washer assortments.
- Keep a temporary overflow extension ready. A flexible downspout extension is useful while you confirm the permanent route. Search Amazon for flexible downspout extensions.
- Do a hose-fill test. Do not wait for the first thunderstorm to learn whether the barrel overflows toward the house.
Step 1: inspect the barrel before water goes in
Set the empty barrel where you can see every side. Look for cracks, bulges, UV-brittle plastic, loose fittings, and damage around the spigot hole. Press gently around bulkhead fittings and threaded ports. If the plastic flexes sharply or shows a spreading crack, do not trust it beside the house.
Check the lid and inlet screen next. The lid should sit flat, lock or fasten as designed, and leave no wide opening for mosquitoes, leaves, or animals. The inlet screen should be intact, not bowed into the barrel. CDC mosquito prevention guidance centers on covering or removing standing water, so the screen is a real startup item, not cosmetic trim.
If the barrel stored winter debris, rinse it before reconnecting. Remove leaves, roof grit, algae film, and sediment near the outlet. A clean barrel protects drip emitters, pump intakes, watering cans, and spigots.
Step 2: rebuild the stand and base
A full barrel is heavy. Before reconnecting the downspout, confirm the stand is level, solid, and sitting on a base that has not settled over winter. Pavers can tilt after freeze-thaw cycles. Soil can soften. Wood blocks can split. A barrel that leans while empty will lean more when full.
The stand should support the whole barrel footprint, not just a few pressure points. Tighten or replace parts that moved during storage. If the barrel sits on a deck, balcony, or raised platform, review our deck and balcony weight safety guide before filling it.
Do not use startup day to improvise a taller stand from loose blocks. Height can help gravity pressure, but stability is more important than a few extra inches. If you need more pressure, compare safer options in our rain barrel height guide.
Step 3: reconnect the downspout or diverter
Reconnect the diverter or downspout path exactly as the manufacturer intends. Diverter kits often need the barrel inlet at a specific height so excess water can return to the downspout. A hose that sags, climbs, or kinks can keep water from entering the barrel or returning safely.
Inspect every hose end. Replace flattened rubber washers, tighten hand connections, and use screen washers where debris tends to collect. Do not overtighten plastic threads with tools unless the manufacturer calls for it; cracked threads are harder to fix than a washer leak.
If you removed a winter bypass, confirm the downspout is no longer dumping at the foundation. Spring startup should restore both capture and safe bypass. For diverter-specific setups, compare parts in our winter and storm bypass diverter valve guide.
Step 4: test the spigot and outlet
Add a few gallons with a hose before connecting drip tubing. Open and close the spigot several times. Watch the handle, threaded outlet, bulkhead nut, and the underside of the barrel. A slow drip at the stand can soften soil for days before anyone notices.
If the leak is at a hose connection, replace the washer first. If the leak is around the barrel wall, drain below the fitting before tightening anything. If the spigot itself is cracked or stripped, replace it before the barrel is full. See our spigots and bulkhead fittings guide for what to measure.
Flush the first water through the outlet to remove grit. If you use drip irrigation, clean the filter and run a short test without emitters attached so sediment does not lodge at the first fitting.
Step 5: force an overflow test
This is the step many owners skip. Fill the barrel until water reaches the overflow or diverter return path. Watch where the water goes. It should move away from the foundation, basement openings, crawlspace vents, patios that slope toward the house, and neighbor property.
A short extension may be enough for testing, but spring storms can exceed a gentle hose-fill rate. Secure the route so it cannot flip back toward the wall. Clear leaves from splash blocks, extensions, and pop-up drains. If the overflow path crosses a walkway, reroute it before it becomes a slip hazard.
The University of Minnesota Extension notes that rain barrels need overflow directed away from the house. Treat that as a startup acceptance test: if overflow is not safe, the barrel is not ready even if it holds water.
Step 6: connect watering gear only after the barrel passes
Once the barrel, stand, inlet, spigot, and overflow pass, reconnect the parts that water plants. Keep the first drip zone short. Watch the farthest emitter. Check filter access. Make sure hoses do not pull on the spigot or create a trip path.
For hand watering, confirm your watering can fits under the spigot or keep a short hose with a shutoff valve. For pumped systems, inspect cords, filters, intake position, and dry-run protection before plugging anything in. Outdoor electrical equipment should use appropriate weather-rated components and GFCI protection.
Startup checklist
- Barrel shell has no cracks, bulges, or brittle ports.
- Lid closes securely and inlet screen has no mosquito-sized gaps.
- Barrel interior is rinsed and sediment is cleared from the outlet area.
- Stand is level, stable, and supports the barrel footprint.
- Diverter or downspout height matches the kit instructions.
- Hose washers are present and flexible.
- Spigot opens, closes, and stays dry at the wall fitting.
- Overflow test sends water away from the house.
- Drip, hose, pump, or watering-can setup is tested after the barrel itself passes.
Source notes
- University of Minnesota Extension: rain barrels and water harvesting
- CDC: prevent mosquitoes around your home
- Electrical Safety Foundation International: outdoor electrical safety
FAQ
When should I reconnect a rain barrel in spring?
Reconnect after hard-freeze risk is low and before regular spring rain. Do not reconnect only by calendar date. The barrel, stand, screen, diverter, spigot, and overflow route should pass a hose-fill test first.
What is the most common spring rain barrel leak?
Washer leaks are common because hose washers flatten, crack, or disappear during winter storage. Start there before replacing larger parts. Also check cracked plastic threads, loose bulkhead fittings, and hose ends that were stored under tension.
Should I clean a rain barrel before reconnecting it?
Yes. Start the season with an empty-barrel inspection: tip out loose debris, wipe the outlet area, confirm the screen still fits, and run a few gallons through the spigot before saving water for garden use.
How do I test rain barrel overflow before a storm?
Run the test in daylight with a helper if possible. Add water slowly until the overflow starts, then trace the entire discharge route. Fix any splashback against siding, pooling near pavers, or sagging extension before you leave the system connected for a real storm.