Quick picks
| Product | Key Specs |
|---|---|
| See price on Amazon |
|
| See price on Amazon |
|
| See price on Amazon |
|
Product availability, certifications, and retailer details can change; check the current Amazon page before buying.
A rain barrel can run a soaker hose, but it will not behave like a pressurized outdoor spigot. The useful setup is short, clean, gently sloped, and divided into small watering zones. When people are disappointed, the cause is usually one of four things: the barrel is too low, the hose is too long, the filter is missing, or the water has to pass through tiny emitters that were designed for household pressure.
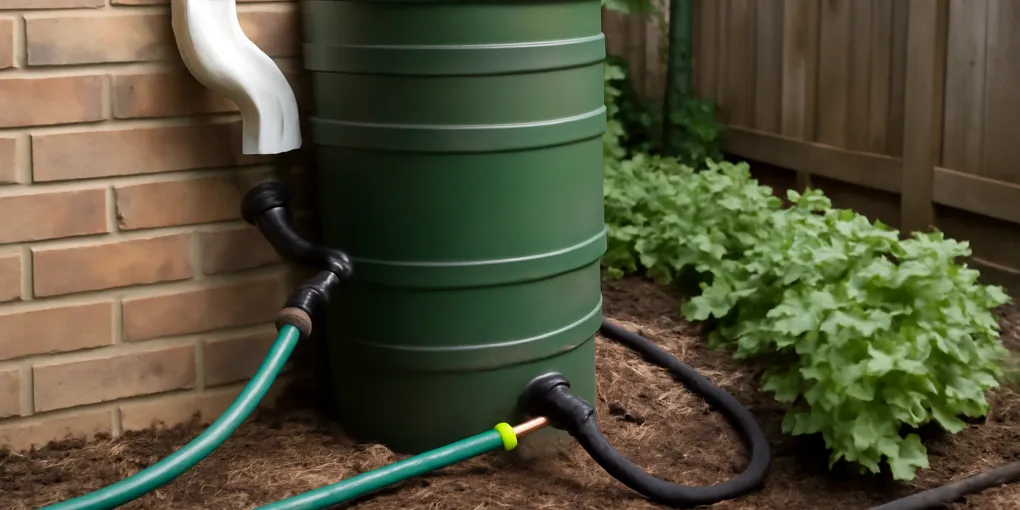
This guide walks through a practical gravity-fed rain barrel soaker hose setup for raised beds, shrubs, and small garden rows. It favors simple parts you can inspect by hand: a stable barrel stand, a coarse inlet screen, an inline garden-hose filter, a full-port shutoff, short hose runs, and a watering schedule based on soil moisture rather than wishful timing.
If you are still choosing parts, start with the system limits. A full barrel has more pressure than a nearly empty barrel, and every foot of elevation matters. A short soaker hose near the barrel may weep evenly; the same hose stretched across the yard may barely dampen the first few feet and leave the far end dry. The goal is not to force the barrel to act like municipal water. The goal is to build a small low-pressure watering circuit that matches the barrel.
Before you buy parts
Pair this setup with our guides to low-pressure drip irrigation kits and rain barrel filters for clogged emitters if your garden has multiple beds or recurring debris problems.
Useful shopping searches to compare:
- Check Amazon results for low-pressure soaker hose — look for short lengths, removable end caps, and pressure guidance.
- Check Amazon results for inline hose filters — choose a cleanable screen that does not choke flow.
- Check Amazon results for full-port hose shutoff valves — avoid tiny internal openings that become the bottleneck.
The simple parts list
For one bed, you usually need a barrel on a stable stand, a spigot or bulkhead outlet, one short leader hose, an inline filter, a shutoff valve, the soaker hose, landscape staples, and a removable end cap. If the barrel outlet is narrow or the spigot is old, replace that weak point before adding more tubing. A shiny new hose cannot fix a valve that only leaves a pencil-thin water path.
Use food-safe or garden-safe components according to the barrel and hose manufacturer instructions. Rain barrel water is generally used for ornamental plants and soil watering, not drinking. Avoid overhead spray on edible leaves when water has been stored, and follow local public-health or extension guidance for edible gardens.
Step 1: Raise the barrel safely
Gravity pressure depends on water height. One foot of water elevation produces roughly 0.43 psi, so a barrel spigot two feet above the hose is still very low pressure compared with a house spigot. That is why many ordinary soaker hoses work poorly unless the run is short and the barrel is elevated.
Raise the barrel only on a stable platform rated for the load. Water weighs about 8.3 pounds per gallon, so a 50-gallon barrel can exceed 400 pounds before you count the barrel, stand, and wet debris. Use solid blocks, a purpose-built stand, or a level platform on compacted ground. Do not stack loose bricks, set the barrel on an unstable deck rail, or raise it so high that filling, cleaning, and winterizing become unsafe.
A modest elevation is still worthwhile. Even 18 to 30 inches can improve flow enough for one short soaker zone. The safest test is practical: fill the barrel, connect a short hose, and time how long it takes to fill a bucket at the garden bed. If the bucket test is painfully slow, a long soaker hose will not improve it.
Step 2: Filter before the soaker hose
Soaker hoses clog because stored rainwater carries roof grit, pollen, leaf fragments, shingle granules, algae, and mosquito-control residue. A barrel inlet screen helps, but it is not enough for tiny pores. Add a cleanable inline filter between the barrel and the soaker hose, then inspect it after the first few watering sessions.
Choose a filter you can open without tools. A clear housing is convenient because you can see trapped debris, but a simple removable screen is often enough. Place it where you can reach it without crawling under the barrel. If the filter clogs every session, improve the upstream screen, clean the barrel bottom, and consider a first-flush or leaf-diverter improvement before blaming the hose.
Step 3: Keep the first zone short
Start with one short zone instead of trying to water the whole garden from one barrel outlet. For many gravity systems, a 25-foot soaker hose is a better first test than a 50- or 100-foot run. Lay it on level ground or with a gentle downhill path from the barrel. Avoid long uphill sections, tight kinks, and loops that trap air.
If you need multiple beds, use manual zones. Water bed one, close the valve, move the connection or open bed two, and repeat. A manifold can work, but opening every branch at once divides already-limited flow. The best rain barrel system often feels less automatic than a pressurized irrigation system, but it is more reliable because each zone receives the limited water intentionally.
Step 4: Prime and test the hose
Open the barrel valve and let water push air out of the leader hose before connecting the soaker hose fully. If the soaker hose has a removable end cap, open it briefly until water reaches the far end, then cap it and watch the weep pattern. You should see dampness along the line, not a strong spray.
Do the first test on dry cardboard, mulch, or bare soil where the wetting pattern is visible. Let the system run for 20 to 30 minutes, then check the first third, middle, and far end. If the first section is wet and the end is dry, shorten the hose, raise the barrel, clean the filter, or divide the bed into two zones.
Step 5: Place the hose where roots are
Soaker hoses should water the root zone, not the walkway. In vegetable beds, run the hose near plant rows and cover it with mulch after you confirm the wetting pattern. Around shrubs, use a loose loop under the dripline rather than tight coils against the trunk. Keep the hose visible during testing so you can find kinks and dry sections.
Mulch helps because low-pressure watering is slow. It reduces evaporation, keeps the soil surface from crusting, and makes the water spread more evenly. After the pattern looks right, cover the hose lightly instead of burying it deep. A buried hose is harder to inspect, flush, and remove before freezing weather.
Step 6: Water by soil response, not barrel hope
A rain barrel is a storage tank, not an unlimited supply. One inch of water over a 100-square-foot bed equals about 62 gallons, which is more than many barrels hold. Use the barrel for targeted watering, seedling support, container overflow, or supplemental deep watering, not as a guarantee that the whole garden is covered during drought.
Check soil moisture several inches down after a run. If the surface is damp but the root zone is dry, the session was too short or the flow too low. If water pools near the barrel end, shorten the run or reduce slope. Keep notes for the first week: barrel level before watering, zone length, run time, and observed soil moisture.
Match the session to the crop and weather. Newly planted seedlings may need lighter, more frequent checks because their roots are shallow. Established tomatoes, shrubs, and perennials usually benefit from slower watering that reaches deeper soil. After heavy rain, skip the barrel run and save stored water for the next dry spell. During hot wind, inspect the far end of the hose sooner because surface drying can hide uneven distribution.
Do not use barrel volume as the only success measure. Emptying the barrel feels productive, but the garden may still be unevenly watered if the first section receives most of the flow. A hand trowel, soil probe, or finger check near several plants tells you more than the barrel level alone.
Step 7: Flush and maintain the line
Every few sessions, remove the end cap and flush the soaker hose until the water runs clearer. Clean the inline filter at the same time. If flow gradually declines, inspect the barrel bottom for sludge and the inlet screen for leaf mats. A soaker hose system is only as clean as the stored water feeding it.
Before freezing weather, disconnect, drain, and store the hose according to the product instructions. Our rain barrel winterization checklist covers the larger system. Do not leave a water-filled soaker hose attached to a barrel through freeze-thaw cycles.
How we score this setup
| Criterion | Weight | How to apply it here |
|---|---|---|
| Research | 30% | Confirm the hose is compatible with low pressure and check local rainwater-use guidance for edible beds. |
| Evidence Quality | 25% | Give more weight to a bucket-flow test, soil moisture checks, and manufacturer pressure ranges than to generic garden claims. |
| Value | 20% | Spend first on elevation, filtration, and short zones before buying complicated timers or manifolds. |
| User Signals | 15% | Watch for dry hose ends, frequent filter clogging, pooling near the barrel, and slow bucket-fill times. |
| Transparency | 10% | Label the setup as supplemental gravity watering so expectations stay realistic during hot dry weeks. |
Troubleshooting quick fixes
If no water reaches the hose, open the end cap, clean the filter, and confirm the barrel outlet is not blocked. If only the first few feet weep, shorten the run or raise the barrel. If the hose sprays from one spot, replace the damaged section because gravity systems cannot afford leaks. If the system works only when the barrel is full, make smaller zones that still function when the water level drops.
If water smells bad or contains visible sludge, stop irrigating edible plant leaves and clean the barrel. The U.S. EPA and local stormwater programs commonly emphasize covered storage, screens, and removal of standing-water mosquito habitat. Clean storage protects both the garden and the equipment.
FAQ
Can one rain barrel run a 100-foot soaker hose?
Usually not well under gravity alone. Some very low-pressure products may work in limited situations, but a shorter 25-foot zone is a more reliable starting point.
Should I use a timer with a rain barrel soaker hose?
Use a timer only if it is rated for low pressure and does not restrict flow too much. Manual valves are simpler and easier to diagnose during the first season.
Is rain barrel water safe for vegetables?
Use local guidance and the barrel manufacturer’s instructions. Many gardeners apply stored rainwater to soil around edible plants, avoid overhead leaf spray, and do not use it for drinking or washing produce.
Why does the hose work at first and then slow down?
The filter may be clogging, the barrel water level may be dropping, or sediment may be entering the hose. Clean the filter, flush the hose, and retest with the barrel full.
Sources
- University of Minnesota Extension, Water Wisely guidance for home landscapes: https://extension.umn.edu/how/water-wisely-start-your-own-backyard
- U.S. EPA, mosquito control around standing water: https://www.epa.gov/mosquitocontrol
- U.S. Geological Survey, water measurement basics and practical water volume context: https://www.usgs.gov/special-topics/water-science-school