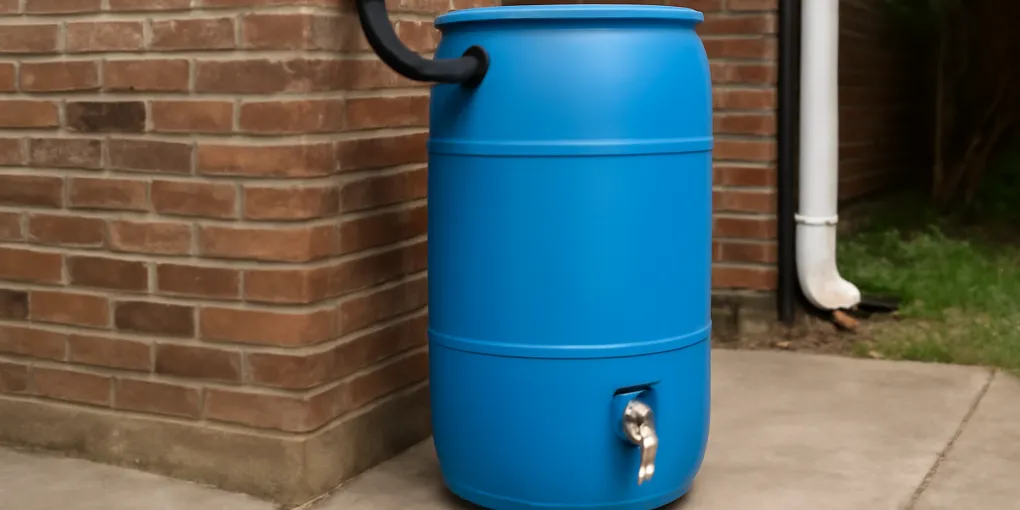
EarthMinded DIY rain barrel diverter and parts kit
Best sealed retrofitUse Case: Converting a closed food-grade drum with a side fill hose and basic spigot
Quick picks
| Product | Key Specs |
|---|---|
| See price on Amazon |
|
| See price on Amazon |
|
| See price on Amazon |
|
| See price on Amazon |
|
Product availability, certifications, and retailer details can change; check the current Amazon page before buying.
A food-grade drum can become a useful rain barrel, but the kit matters more than the blue plastic. A good conversion kit gives you a sealed fill path, a screened opening or closed diverter, a gasketed spigot, and a real overflow route. A weak kit gives you a faucet that drips, an open mosquito entrance, or a barrel that dumps the first full storm at your foundation.
This guide is for people who already have, or can source, a clean food-grade drum with a known history. If you are still deciding between a ready-made barrel and a DIY build, start with best rain barrels for small yards and patios. If your main problem is downspout fit rather than the barrel body, compare rain barrel diverter kits for common downspouts.
Quick picks for drum conversion kits
- Search Amazon for EarthMinded DIY kits when you want a beginner-friendly sealed diverter, hose, gaskets, and hole-saw guidance in one package.
- Search Amazon for RainReserve connector kits when you may link a second drum or want replaceable side-port parts.
- Search Amazon for Aquabarrel DIY parts if you are assembling a screened open-top setup and want to choose each fitting.
- Search Amazon for bulkhead and spigot kits when the drum is sound but the outlet hardware needs a stronger repair.
For most first builds, the safest buy is a sealed diverter kit matched to your downspout plus a separate overflow plan. It keeps roof debris and mosquitoes out more reliably than a loose hole in the lid, and it usually includes the drill sizes the gaskets were designed around.
First check the drum, not the kit
Do not convert a mystery barrel. The drum should be food-grade, rinsed, free of chemical smell, and structurally intact. Look for deep gouges, brittle sun damage, cracks around bungs, and a bottom seam that flexes when you push on it. A 55-gallon barrel can hold roughly 450 pounds of water before you add the drum and stand weight, so a compromised wall is not a bargain.
Also decide whether the barrel will stay closed. A closed top with a side diverter is usually easier to screen and safer around children, pets, and mosquitoes. An open-top build can work, but it needs a tight lid, corrosion-resistant screen, and a way to remove debris without leaving a bucket-sized opening.
If the drum came with threaded bungs, do not assume those ports replace a proper overflow. Bungs can help with cleaning or venting, but stormwater still needs a controlled path away from the house.
What a complete conversion kit should include
A practical conversion kit should solve four jobs. First, it needs an inlet: either a downspout diverter with fill hose or a screened lid opening. Second, it needs an outlet: a spigot or bulkhead placed high enough for a watering can or hose connection. Third, it needs mosquito control: screen, sealed hose ports, or a tight lid. Fourth, it needs overflow: a hose, diverter bypass, linked-barrel port, or dedicated outlet that can handle full-barrel conditions.
Some boxed kits include all of this. Others include only a spigot and a few washers. Read the parts list closely. A kit that lacks a hole saw is still fine if it names the exact hole diameter. A kit that says only “fits most barrels” without dimensions is a risk, especially on curved drum walls where flat washers may not compress evenly.
Avoid mixing random plumbing parts before you understand the thread type. Garden hose threads, pipe threads, and bulkhead fittings do not seal the same way. If your first test shows water around the wall hole rather than at the hose face, review rain barrel hose washers and thread-seal tape before adding more force.
Sealed diverter kits: best for most beginners
A sealed diverter kit routes water from the downspout into the barrel through a hose and sends excess water back down the downspout when the barrel is full, if the kit is installed at the correct height. That makes it a strong choice for patios, side yards, and homes where an open overflow splash would be a problem.
The key measurement is fill height. The diverter port and barrel inlet need to be set so water stops entering the barrel before it reaches the lid. If the hose runs uphill, sags, or enters too low, the system can fill slowly or back up. Before drilling, place the drum on its final stand, mark the waterline, then mark the diverter cut. A kit that includes a clear template is worth paying for because one wrong hole can turn a clean drum into a patch job.
Choose this route when you want fewer loose parts, better mosquito control, and a neater installation. Choose a separate open-screen setup only if you need high flow, have a wide lid that can be screened properly, and can route overflow safely.
Component kits: best for controlled DIY builds
Component kits make sense when you are comfortable planning the inlet, outlet, and overflow yourself. This is common when the downspout is odd-sized, the barrel will sit under a shed roof, or you are replacing weak hardware on an existing DIY barrel.
For the spigot, prefer a gasketed bulkhead that matches the drum wall. A brass or sturdy polymer spigot can be useful, but the wall seal does the hard work. The gasket should sit flat, compress evenly, and not twist as you tighten the fitting. Drill once, remove plastic burrs, dry-fit the part, then fill only above the spigot for the first leak test.
For the inlet, use stainless or outdoor-rated screen fine enough to block mosquitoes while still removable for cleaning. For the overflow, size the outlet and hose for a storm, not just a drip. A small overflow fitting can still be overwhelmed when a big roof area drains into one drum.
What to avoid
Do not buy a kit only because it includes a decorative spigot. A nice outlet does not fix a missing overflow or an open mosquito path. Do not drill near the bottom seam unless the fitting instructions allow it; curved and reinforced areas can be harder to seal. Do not stack washers to compensate for the wrong hole size. That usually fails after the barrel flexes through a few fill cycles.
Also avoid using a converted barrel for potable water. Household rain barrels are for non-potable outdoor uses unless a local code-compliant treatment system says otherwise. The EPA frames rain barrels as stormwater and garden-water tools, not drinking-water systems, and many extension guides advise using collected roof runoff carefully around edible crops.
One more buying test: price the kit against the missing parts. A cheap spigot-only kit can become expensive after you add a screen, hole saw, overflow hose, downspout adapter, and replacement washers. A slightly pricier boxed kit is often the better value when it prevents two hardware-store trips and one wrong hole.
Practical score for conversion kits
| Criterion | Weight | What it means for a DIY drum conversion |
|---|---|---|
| Research | 30% | Start with drum history, downspout size, final stand height, and overflow route before choosing a kit. |
| Evidence Quality | 25% | Kit dimensions and extension stormwater guidance matter more than broad “fits most barrels” claims. |
| Value | 20% | A boxed diverter kit can be cheaper than replacing a misdrilled drum, extra gaskets, and a bad spigot. |
| User Signals | 15% | Early leaks usually point to hole size, gasket placement, curved wall compression, or unsupported overflow. |
| Transparency | 10% | DIY barrels are non-potable outdoor-water tools and still need mosquito screening and safe discharge. |
Rain Barrel Conversion Kit FAQ
Can I use a used pickle or syrup barrel?
Yes, if it is genuinely food-grade, has a known prior use, and can be cleaned until no odor remains. Strong odors can transfer to stored water and attract pests. Unknown industrial drums are not worth the risk.
Should the spigot go as low as possible?
Not usually. A very low spigot is hard to reach, more likely to sit in sediment, and may not clear a watering can. Leave some sediment space below the outlet and use a separate drain or cleanout plan if you want to empty the last few inches.
Do I need a first-flush diverter on a DIY barrel?
Not always, but it can help when the roof drops pollen, grit, or leaf debris before each storm. A sealed diverter and clean gutters are the first priorities. For sizing and installation tradeoffs, read rain barrel first-flush diverter setup.
What should I buy if the barrel already has a spigot hole?
Measure the existing hole and wall thickness before buying. If the hole is round and clean, a matching bulkhead and gasket kit may work. If it is enlarged, cracked, or oval, a larger repair fitting or replacement barrel may be safer.
Sources
- EPA, Soak Up the Rain: Rain Barrels
- Penn State Extension, Rain Barrels
- University of Minnesota Extension, Rain barrels
Frequently Asked Questions
- No. Use only a clean food-grade drum with a known prior use, an intact wall, and a lid that can be screened or sealed. Avoid drums that held chemicals, oils, solvents, pesticides, or unknown liquids.
- A kit can save money when you already have a safe drum and basic tools. A finished barrel is usually easier when you need a decorative shape, warranty support, molded overflow, or a lid designed for child and mosquito safety.
- Use the hole size specified by the exact bulkhead or spigot kit. Do not guess from the pipe size because gasket kits often need a larger wall hole than the threaded outlet size.
- Yes. A converted drum fills quickly. Plan an overflow hose, downspout bypass, or linked second barrel before the first storm so water does not spill against the foundation or stand.