Quick picks
Low-pressure container drip kit
★ Top pick Best starting kit- Use Case: Short patio and grow-bag zones fed by a raised rain barrel
- Best For: Tomato pots, herb containers, fabric grow bags, and patio beds
- Watch For: Low-pressure rating, cleanable filter, emitter flow, and enough shutoff valves
Inline hose filter for rain barrel drip
Best clog prevention- Use Case: Catching roof grit before it reaches small emitters
- Best For: Barrels under trees, shingle roofs, and container drip lines with tiny outlets
- Watch For: Thread size, mesh access, clear housing, and cleaning without draining the barrel
Hose splitter with individual shutoff valves
Best zone control- Use Case: Separating thirsty pots from herbs and small containers
- Best For: Mixed patio gardens that need two or three short watering zones
- Watch For: Full-port valves, brass or sturdy polymer body, and leak-free washer fit
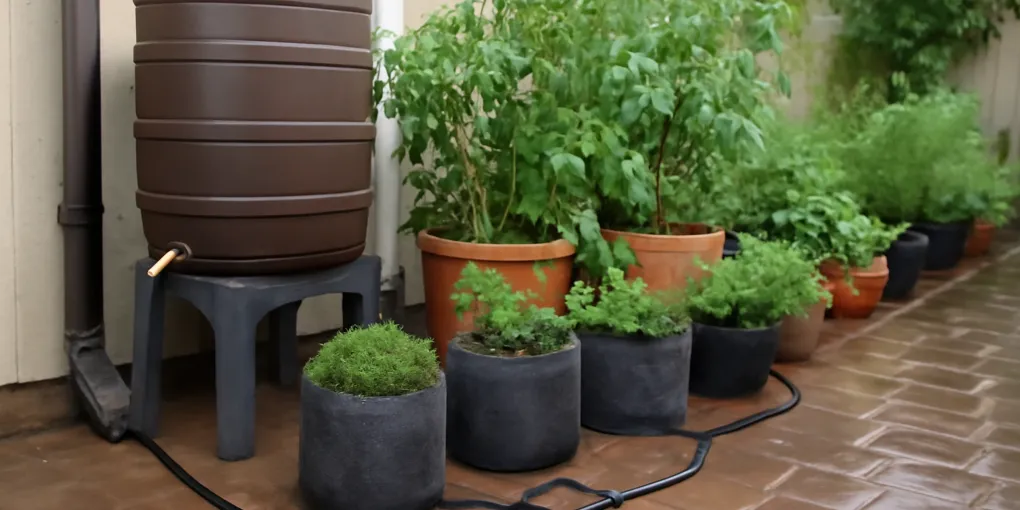
Container gardens look like an easy match for a rain barrel: the pots are nearby, the water demand is visible, and a patio barrel can save trips with a watering can. The catch is pressure. A rain barrel is not a hose bib, and containers punish uneven watering faster than in-ground beds.
A good layout keeps the run short, raises the barrel safely, filters water before tiny emitters, and splits pots into small zones. The goal is not to automate every container in the yard. The goal is to make stored rainwater useful for the pots that are close enough and low enough for gravity to reach.
If your garden is in raised beds rather than movable pots, compare this with our rain barrel raised bed watering layout. If your barrel barely flows through a hose, start with rain barrel height and water pressure before buying drip parts.
Quick picks
Use this order for most patio container gardens:
- Put the barrel on a stable, low stand with the spigot higher than the container drip line.
- Keep the first zone within a short hose run of the barrel.
- Add a cleanable filter immediately after the spigot or splitter.
- Use tubing and emitters sold for low-pressure or gravity use.
- Split thirsty pots and small herbs into separate shutoff zones.
- Test with the barrel half full, then again when it is nearly empty.
For parts, start with a low-pressure kit and only add complexity when the test shows you need it.
- Search Amazon for low-pressure container drip kits for short runs to tomato pots, grow bags, and patio beds.
- Search Amazon for rain barrel inline hose filters before small emitters or drip rings.
- Search Amazon for hose splitters with individual shutoff valves when herbs, peppers, and large tomato pots need different run times.
Step 1: group containers by water demand
Do not connect every pot just because it is on the same patio. A tomato grow bag, a basil pot, a hanging basket, and a succulent bowl do not need the same watering schedule. Put thirsty containers in the first rain-barrel zone and keep light-water pots separate.
For one elevated basket rather than a full container zone, see how to water hanging baskets from a rain barrel.
A practical first zone might be four tomato containers or six to eight medium vegetable pots close to the barrel. Herbs that hate wet roots should have their own valve or stay on a watering can. If one line feeds everything, you will either underwater large containers or keep small pots constantly wet.
University extension watering guidance for gardens is consistent on one point: water has to reach the root zone, not just wet the surface. Containers dry from heat, wind, and limited soil volume, so check the soil after a test run instead of trusting minutes on a timer.
Step 2: raise the barrel without making it unsafe
More height gives more head pressure, but a full barrel is heavy. A 50-gallon barrel holds more than 400 pounds of water before counting the barrel, stand, fittings, and wet soil around it. Use a level base and a stand designed for the load. Do not stack loose blocks on soft soil just to gain a few more inches of pressure.
For containers, modest height plus short tubing usually beats a tall, risky tower. Put the barrel where the spigot is above the tubing and where the overflow still routes away from the foundation. If the stand rocks when the barrel is half full, fix the base before adding irrigation.
See our rain barrel stand stability guide if the patio slopes, the stand sits on pavers, or the barrel will be near children and pets.
Step 3: keep the tubing short and wide enough
Gravity loses flow through long, narrow, twisted tubing. Container gardens often fail because the first pot near the barrel gets water while the farthest grow bag gets almost none. Use the shortest practical run, avoid unnecessary elbows, and choose tubing sized for low-pressure use.
Drip rings can work well around large pots because they spread water across the surface. Tiny point emitters can clog or deliver too little water unless the barrel is clean and the zone is short. For fabric grow bags, two small outlets may wet better than one emitter in the middle.
Test the farthest pot with the barrel half full. If flow is weak, shorten the zone, reduce emitter count, raise the barrel safely, or switch that zone to a watering can. Do not add more emitters to a line that is already starving.
Step 4: put the filter where you will clean it
A screened inlet catches leaves, but it will not catch every roof granule, algae flake, seed, or mosquito-screen fiber. Container drip emitters have small openings, so add a cleanable filter before the drip tubing. The filter should be easy to unscrew without draining the barrel or crawling behind planters.
Clear filter housings are helpful because you can see sediment. A flushable or removable screen is better than a sealed mystery cartridge. Rinse it after heavy storms, pollen drops, and the first week of spring startup. If the same filter clogs every session, clean the barrel bottom and inspect the inlet screen before blaming the drip kit.
Search Amazon for inline hose filters for rain barrel drip
Best for: small emitters, drip rings, and barrels under trees or asphalt shingles. Watch for: hose thread compatibility, mesh access, replacement screens, and enough clearance to open the filter without snapping tubing.
Step 5: split zones with shutoff valves
Container gardens change through the season. Tomatoes get huge, herbs bolt, seedlings move, and grow bags dry faster in July than they did in May. A hose splitter with individual shutoff valves lets you water one cluster longer without drowning the rest.
Keep the splitter simple. Two or three zones are easier to manage than a spiderweb of tubing. Label the valves if the lines disappear behind pots. Open one zone at a time when pressure is weak. Running every zone at once may look convenient but often reduces flow to the farthest containers.
Search Amazon for garden hose splitters with shutoff valves
Best for: patios with mixed pot sizes, vegetables plus herbs, or a front row and back row of grow bags. Watch for: full-port valves, rubber washers, hand clearance, and whether the splitter body will hit the barrel stand.
Step 6: run the bucket-and-pot test
Before you trust the layout, fill the barrel at least halfway and run a real test.
- Open one zone.
- Time five minutes of watering.
- Check the farthest pot first.
- Push a finger or trowel into the potting mix to see whether water reached the root zone.
- Check the nearest pot for puddling or runoff.
- Repeat when the barrel is low.
If the farthest pot stays dry, shorten the line or reduce emitters. If the nearest pot floods, split the zone or use a lower-flow outlet there. If every pot waters evenly when the barrel is full but not when low, plan to refill or finish with a watering can during dry spells.
When a pump is justified
A pump is useful when the container area is uphill, across the yard, or too large for short gravity zones. It is not the first fix for dirty water, too many emitters, or a barrel that sits on an unstable base. Pumped systems still need filters, overflow routing, and dry-run protection.
If you are debating pump versus gravity, read our solar pump vs gravity rain barrel irrigation guide before buying. Many patio gardens can stay gravity-fed if the first zone is small and the barrel is close.
Source notes
- University of Minnesota Extension: rain barrels and water harvesting
- Penn State Extension: rain barrels
- EPA: Soak Up the Rain, rain barrels
Frequently Asked Questions
- Yes, if the barrel is raised, the containers are close, and the drip parts are rated for low pressure. Keep zones short, use a clean filter, and test flow at the farthest pot before leaving the system unattended.
- It depends on pot size, plant type, weather, and emitter flow. A 50-gallon barrel can disappear quickly in hot weather. Start with one short zone, time a watering session, and expand only after the farthest container wets evenly.
- Not always. Gravity can work for close patio pots and grow bags. A pump may help when containers are uphill, far away, or watered through many tiny emitters, but it adds filters, dry-run risk, and more maintenance.
- Put a cleanable filter before the small tubing or emitters, close enough to the barrel that you will rinse it. A screened inlet helps, but roof grit and algae flakes can still clog container drip outlets.